Shimmery, Glittery Silver Pine Cone DIY
Do you want your holiday season to shine, shine, shine? Christmas decorations warm the cockles of my heart and put a big ole smile on my face. Because you’re reading this, the same must be true for you. This silver glitter pine cone DIY will make all your decor shimmer and sparkle.
Silver really picks up and reflects light. It combines beautifully with white, jewel tones, fits wonderfully into a wintery theme and is a fitting companion to gold. If you’re going for a mod theme this year, silver will really jazz things up. Cones work well with all decor so I’m sure you’ll find a place for them on your mantle, table wreath or tree.
This post may contain affiliate links, you can read our policies here.
Silver pinecone DIY:
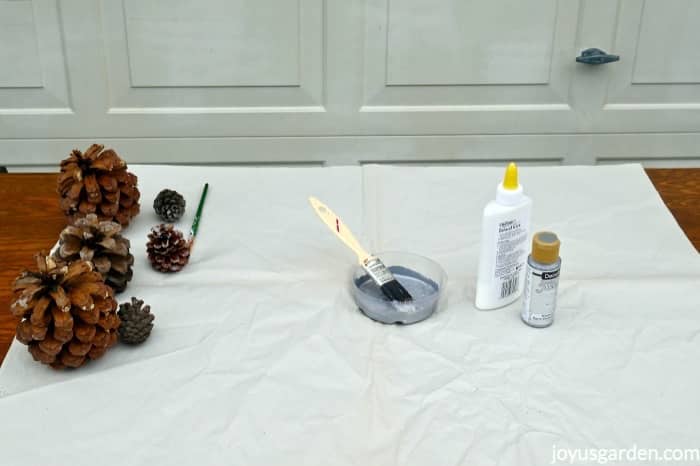
The materials used for this silver glitter pine cone diy:
Pine cones. I foraged mine here in AZ & also in CA but you can find them in craft stores & also online.
Silver metallic paint. I used this one but Modern Masters is my fav.
Glitter. I’ve had mine for ages but you can find silver glitters similar to the three I used here, here & here.
School Glue. This is also called white glue & it’s great to use because it dries clear. I’m currently using a dollar store brand but Elmer’s is a brand you might know.
Paint brushes. What size you use depends on the size cones you’re painting & how fast you want this DIY to go. I used a 1″ house painting brush & a much smaller one for fine art.
A small bowl. This is needed to mix the paint & glue. I used a plastic plant saucer but use whatever you have on hand. Save it for future crafting projects.
Something to glitter onto. I used a flexible cutting board. When I owned a commercial Christmas decorating business, large trays & plastic bowls did the trick. Kraft paper would be fine too.
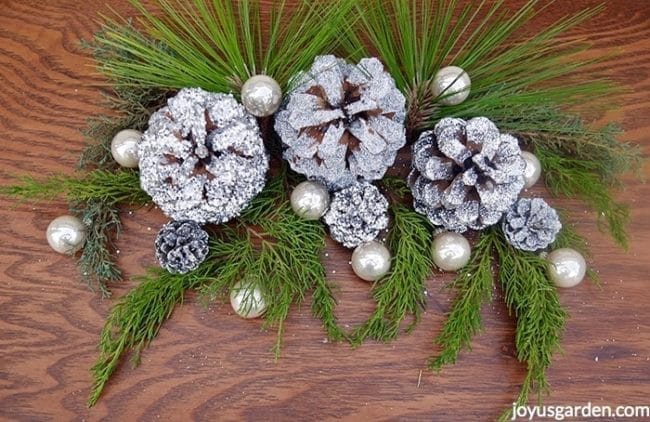
I dressed up the cones a bit so you can get an idea of how they can be used.
These shimmery, glittery silver cones come together in 3 easy steps:
1. Mix the paint & glue together well. I use equal parts of both.
The paint & glue is all mixed up.
If the mixture is super thick, then add in a few drops of water & go from there. If it’s too thin, it’ll run off the cone & make a big mess. I know this first hand!
2. Paint the pine cones. How you much of the cones you paint depends on the look you want.
I like painting pine cones with a brush rather than spray painting because you have more control over the look. Sometimes I just want to tip my pine cones with glitter & not heavily coat them.
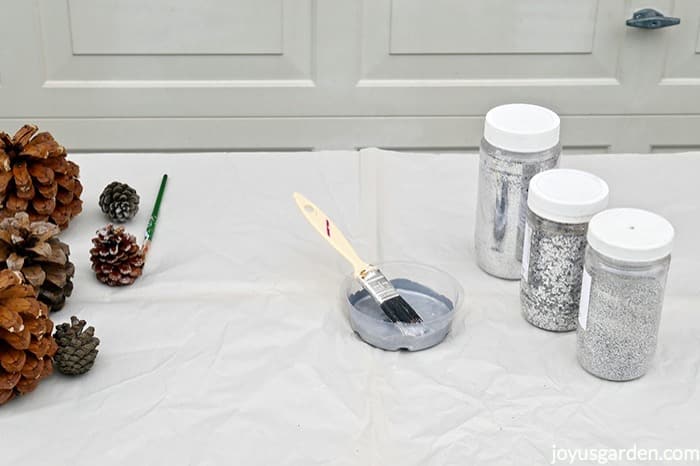
I used different silver glitters to create different effects. I have lots of glitters leftover from my Christmas decorating business.
3. Sprinkle on the glitter while the paint & glue are still wet. This is the fun part. Sometimes I leave the glitter on for a few minutes to make sure it really adheres.
Tip: I gave my foraged pine cones a good brushing off before starting this project. You can stick your pine cones in a 175 degreeF oven for an hour or 2 if you think bugs &/or their eggs might be a problem. Don’t leave the house while they’re “cooking” just to be safe. If you’ve bought the cones, they’re good to go as is.
Make sure the paint and glue have completely dried before handling the cones. I used 1000’s of cones in my years as a decorator and many of them were with me the whole time. These cones will last a very long time if stored properly. You might have to touch up the glitter in 5 years or so but that’s something I don’t mind doing at all.
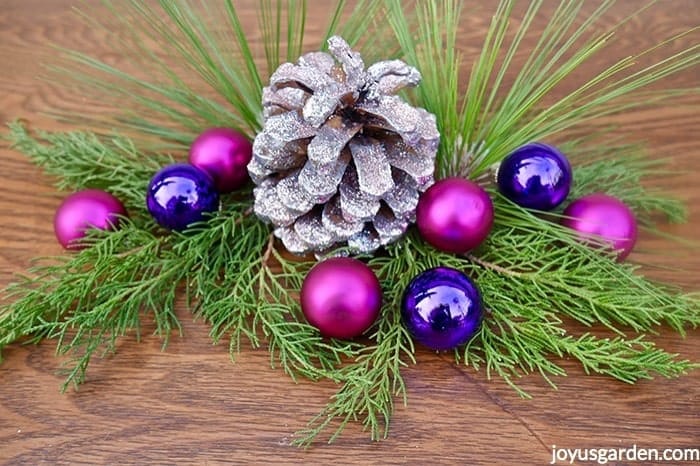
This pine cone shows you a mixture of silver and rose glitters. You can use different color glitters to change things up.
I owned a commercial Christmas decorating business for many years in San Francisco and used a lot of silver in all the decorations. It really adds a touch of light and sparkle to darker office and lobbies. This year my front hall has low urn full of silver and gold pine cones along with shiny deep red and purple balls. It’s a festive way to welcome guests into our home.
Want more pine cone DIYs? Check out lightening & glittering cones & gold gilded cones.
Or, you can get them all in this DIY Glitter Pine Cones: 4 Ways round up post.
I hope this silver pine cone DIY adds sparkle and shine to all your decorations!
Happy decorating, happy holidays,

Here are additional DIY ideas to get you in a festive mood:
- About the Author
- Latest Posts

Nell, the founder of Joy Us garden, was born into a gardening family and grew up in Connecticut’s countryside. After living in Boston, New York, San Francisco, & Santa Barbara, she now calls the Arizona desert home. She studied horticulture & garden design, working in the field all her life. Nell is a gardener, designer, blogger, Youtube creator, & author. She’s been gardening for a very long time & wants to share what she’s learned with you.