Gold Gilded Pine Cones Glittered 4 Ways
The holiday season has come rushing in like Santa and his team of reindeer sending us galloping off to the craft store and back to our work tables. It’s time to get our Christmas decorating groove on! I’ve used pine cones for decorating ever since I was knee-high to a grasshopper. Gold gilded pine cones are so versatile – especially if they are dusted with 4 different kinds of gold glitter.
Gold is warm and elegant. Deep gold is subdued whereas shiny gold is luminous and cheerful. Like silver, it can be combined with almost any other color and used for so many decorating themes. Is there a more classic Christmas combo than red, green & gold?
Gold Gilded Pine Cones Glittered 4 Ways:
The materials used:
Pine cones. Mines were all foraged around mine house. Going on a foraging walk can become part of the experience! But if there are no pine trees around where you live you can always buy them at a craft store or online.
Paint brushes. The size might vary depending on sizes of the cones you’ll be painting. I used a small fine art one and a 1” house painting brush.
Gold paint. I used 2 different ones. One is champagne gold, which is a lighter kind of gold. The other one is glorious gold, this one is a richer kind of gold. My favorite gold paints are the ones from Modern Masters but I had run out.
Different glitters. I’ve had mine for so long that I don’t know if they’re on the market anymore. But here are a few that are similar to what I used: soft gold glitter, vintage golden glitter, extra fine gold glitter, super chunky gold glitter. Another option: rose gold glitter. Ok, with all those you should be covered!
School glue. This is also called white glue & it’s great to use because it dries clear. I’m currently using a dollar store brand but Elmer’s is a brand you might know.
A small bowl. You’ll need this to mix the paints.
Something to glitter onto. You can use Kraft paper or large trays & big plastic bowls. For this project, I used a flexible cutting board.
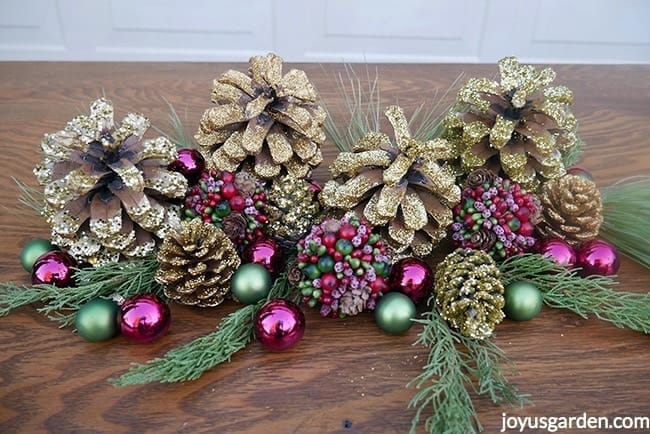
Here are the golden cones all decorated & ready for the season.
Before you even get started on this DIY, make sure that the pine cones are clean of dirt, dust or debris. If you’ve forged your pine cones they might have bugs and eggs living inside them.
To get rid of bugs & eggs you can place the cones in the oven for an hour or two at 175 degrees. Don’t wander off from home though because you don’t want any sap to flame up.
One more thing to consider before starting: glitter gets everywhere, so you probably don’t want to do this project in your formal dining room. I’m lucky it’s still warm here in Tucson in late November so I do this outside where the glitter fly away. If you’re doing it indoors cover up your workspace so that there’s less glitter to vacuum afterward. It travels like crazy!
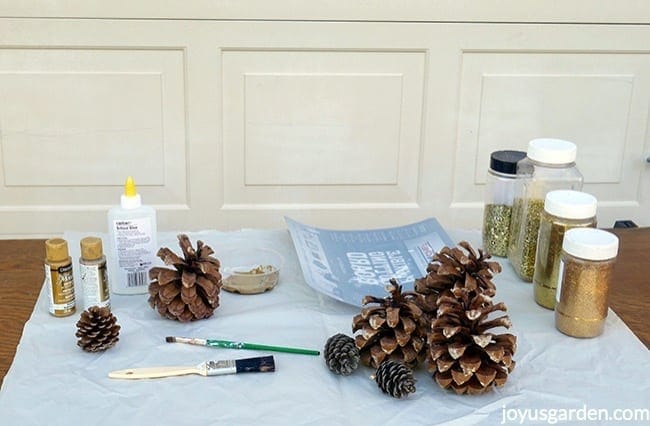
These are all the ingredients I used ready to get started on the decorating job.
Here are the steps:
1st- In the small bowl, mix glue & paint in a ratio of 1:1. By mixing the glue & the paint you’re saving 1 step. The long version would be: painting, letting it dry & then add the glue where the glitter is going to stick. You can save any leftover mixture & use it later on by putting the bowl inside of a tightly wrapped plastic bag or use a lid if you have 1.
Tip: If the mixture starts getting too thick, add a little bit of water. Start by adding a couple of drops & go from there till you get the consistency you want. Conversely, don’t let the mixture too runny because it’ll drip all over once you start to paint. If you overdid it with the water, stir in a bit more glue & paint.
This little pine cone is getting its first brush of paint.
2nd- Now it’s time to have some fun & start painting the cones. You can paint as much or as little as you want based on the look you’re going for. You can dab the tips of the cone, give it a partial brushing or a full on coating.
Tip: If you want a full on paint look, start with the big brush by going all around the cone. Use the small brush to get into the nooks & crannies.
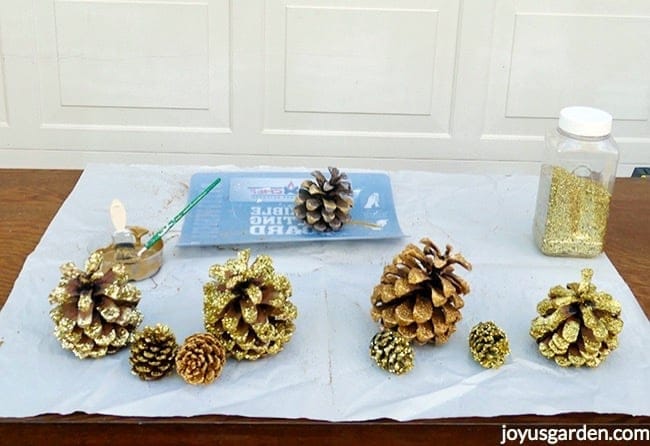
Here are four cones all done with the different types of glitter & ready to bring holiday cheer into my home.
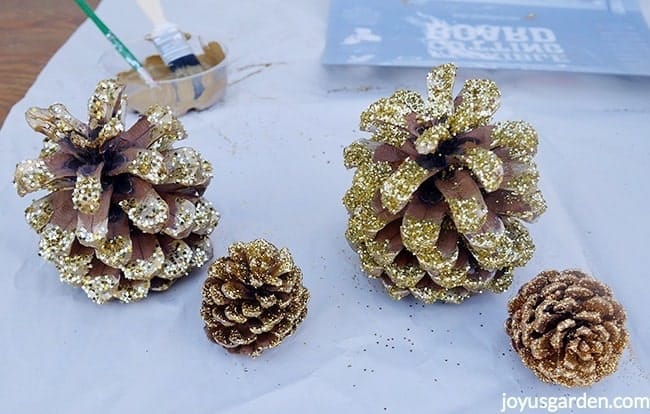
3rd- Time to sprinkle on the glitter. This step needs to come soon after the painting because you don’t want the mixture to dry before you get the glitter on. I always go heavier on the top of the cone because that’s where the glitter picks up a lot of light.
Tip: I leave the glitter on for a few minutes to make sure it really adheres. Also, make sure the paint & glue have completely dried before you handle the cones.
That’s all there is to it – 3 easy steps! You can use different kinds of gold paint, different types of glitter & play with the way you distribute the paint & glitter.

For a bit of fun, I added purple glitter on this cone. You can experiment with different colors if you are looking for a less traditional Christmas look.
These cones will last a very long time if stored properly and with care. You might have to touch up the glitter in 5 years or so but that’s something I don’t mind at all.
Want more pine cone DIYs? Check out lightening & glittering cones, & shimmery silver pinecones. Here’s a round up of all my glitter pinecone tutorials plus examples of how I use the cones in table decorations.
Hope this gold glittered pine cone tutorial helps with your holiday decorating adventures!
Happy Creating, Happy Holidays,

- About the Author
- Latest Posts

Nell, the founder of Joy Us garden, was born into a gardening family and grew up in Connecticut’s countryside. After living in Boston, New York, San Francisco, & Santa Barbara, she now calls the Arizona desert home. She studied horticulture & garden design, working in the field all her life. Nell is a gardener, designer, blogger, Youtube creator, & author. She’s been gardening for a very long time & wants to share what she’s learned with you.