Sparkling Decorations: How I Lighten and Glitter Pine Cones
Seeing a multitude of pine cones laying on the ground prompted me into Christmas crafting mode and inspired me to make a holiday centerpiece. They were a bit too dark for the look I was going for. Here’s how to lighten and glitter pine cones to bring on all the sparkle.
There’s a pine tree near the driveway of my new home and the beautiful medium-sized cones have been dropping off every now and then. Kerplunk – they make quite the sound when they hit the ground.
Be sure to check out this DIY Glitter Pinecones: 4 Ways round-up post for more creative ways to glitter cones.
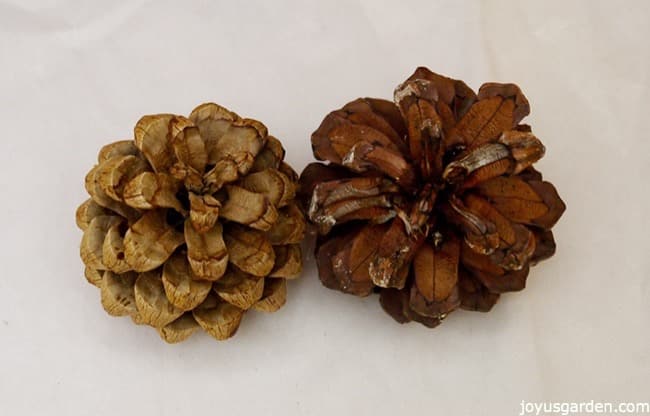
Here’s are 2 cones side by side, 1 lightened & the other not, so you can see the difference.
I grew up in the bucolic countryside of Litchfield County, CT where I collected all kinds, shapes, and sizes of cones. The spruce, pine, fir, and hemlock trees on our property kept me well supplied with natural and free adornments.
I loved any kind of pine cone DIY. Our house was full of pine cone decorations! I still use pine cones for my holiday creations many years later, even though I now live in the Arizona desert.
Lightening & glittering pine cones give them a different look. Here’s how:
This post may contain affiliate links, you can read our policies here.
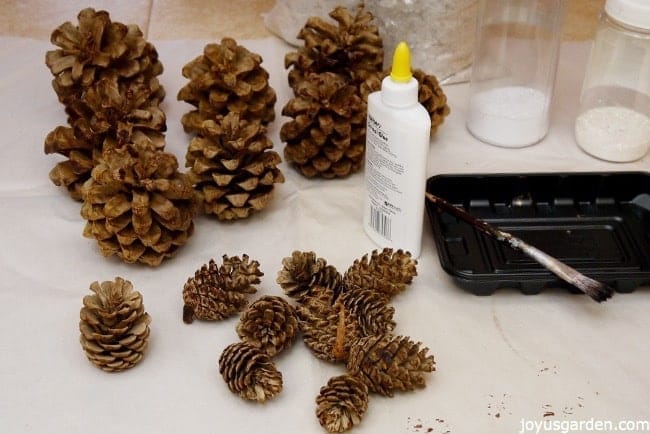
Materials
- Pine Cones. I used 2 sizes
- Glitter. I used 3 types of clear glitters – mica flake, crystal & iridescent.
- School glue.
- Paintbrush.
- Tray, saucer or dish to hold the glue mixture.
- Not shown: bleach & a pail.
How I Lighten and Glitter Pine Cones
1- Shake any debris off the larger cones & put them into a pail. Fill halfway with water. Add the bleach & add more water if necessary – you want the cones to be completely submerged. I used a ratio of 1/3 bleach to 2/3 water.
If you want your cones to be lighter than mine, then use more bleach.
2- Cover the cones with a plate & then put a weight over it – I used a piece of brick edging. This keeps them fully in the bleach mixture.
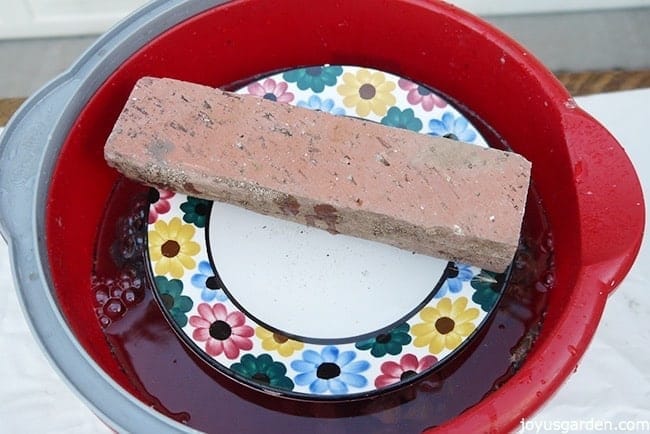
3- Put your cones in a covered area (for me it was the garage) away from children &/or animals. I left mine to “stew” for 3 days & added the smaller cones midway through & a bit more bleach.
4- The cones naturally close up in the water so they need to be opened back up. To do this I let them dry a bit outdoors & then place them on a baking tray lined with foil (this keeps the sap from making a big mess). Place in a 200-250 degree F until they open back up, for me this took about 4 hours. Make sure you don’t leave home when the cones are baking in the oven.
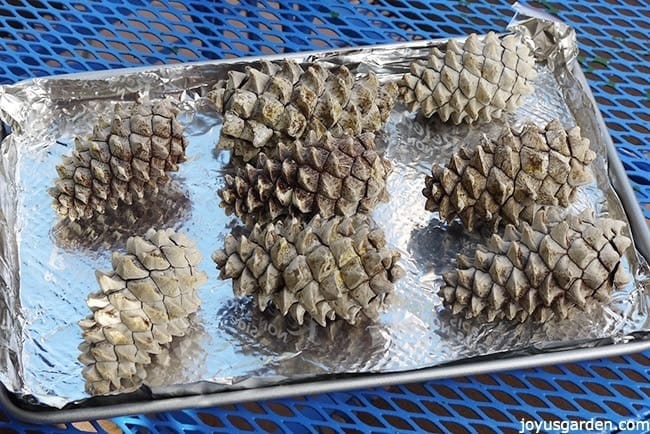
Pine cones in the warm oven make the house smell like Christmas!
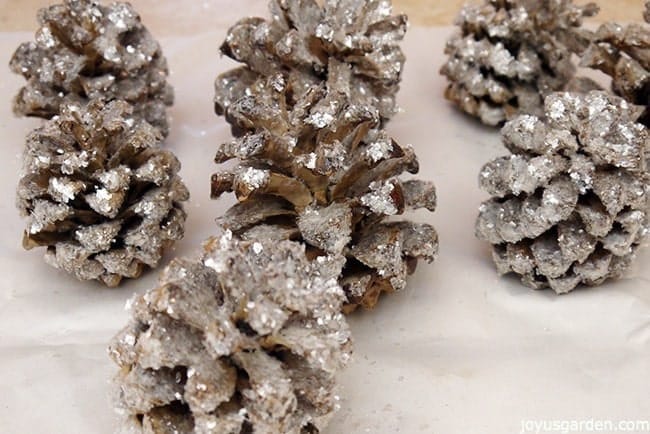
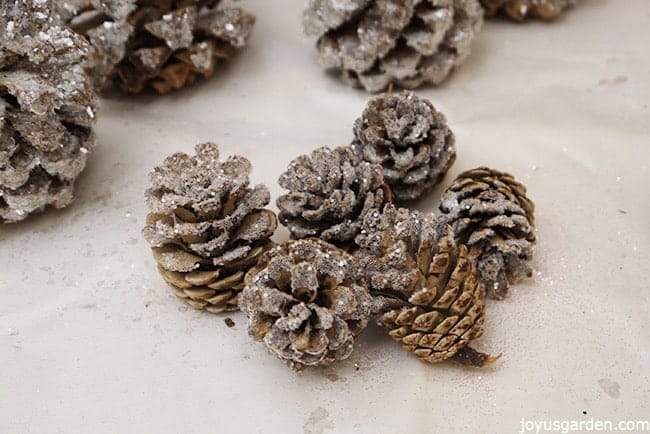
5- Now comes the fun part – making them all sparkly with glitter. I dilute the desired amount of school glue with water, a ratio of about 1:1, & mix it together. I brush the glue on & then cover the cones with the glitter. I leave it on for a few minutes & then shake the excess off.
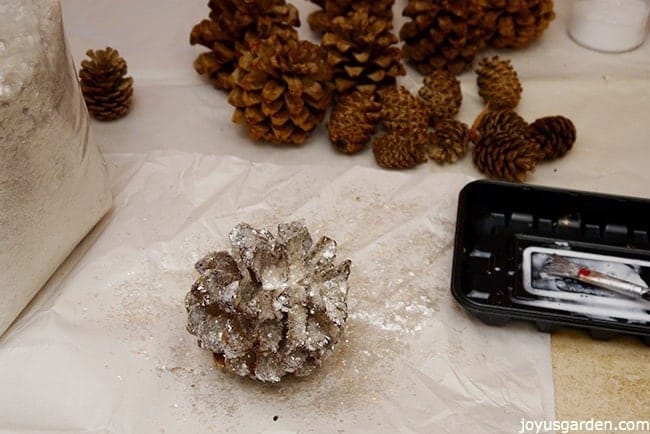
This is the mica flake glitter. It gives a vintage snowy effect.
The crystal glitter gives a subtle shine.
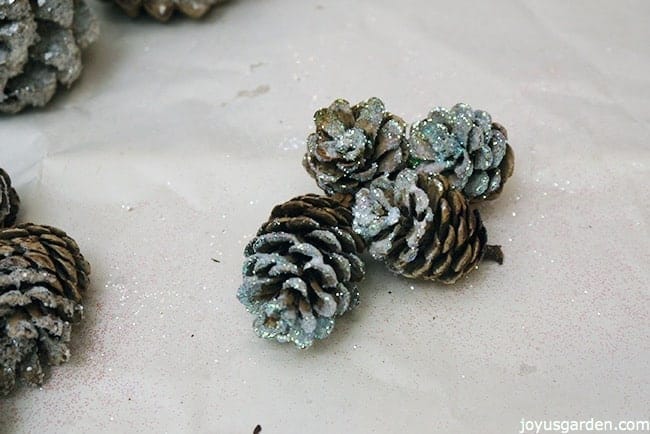
Crystalline or iridescent glitter has different color specks in it & really catches the light.
Now the pine cones are all ready to grace my last-minute Christmas centerpiece. The good thing about these lightened and glittered cones is that you’ll be able to use them for years to come.
The glitter stays on and holds it shine beautifully. How lovely they’d be running down the center of the dining table illuminated by votive candles – simple, festive, and sparkling!
Wishing you a sparkling & joy us holiday season,

- About the Author
- Latest Posts

Nell, the founder of Joy Us garden, was born into a gardening family and grew up in Connecticut’s countryside. After living in Boston, New York, San Francisco, & Santa Barbara, she now calls the Arizona desert home. She studied horticulture & garden design, working in the field all her life. Nell is a gardener, designer, blogger, Youtube creator, & author. She’s been gardening for a very long time & wants to share what she’s learned with you.


I love your videos!!
Well thank you so much Kansas Sunshine … & Happy Holidays! Nell
Did you rinse the cones after removing them from bleach water?
Yes I do Toni. I don’t think it would be an issue but I want to lessen the chance of “bleach smell”. Nell
Great idea for pine cones!
Hi Jane – Thank you! I love pine cones for decorating. Check these snowy cones out: https://www.joyusgarden.com/snowy-glittery-pine-cone-diy-in-3-easy-steps/ Nell
I have done them and made candle holders by gluing 5 cones together and a candle holder in the middle on a piece of felt I have had them for 20 years now
Bonny – That’s the great thing about pinecones. They’re very long lasting, especially when glittered &/or sprayed. Nell