Monstera Adansonii Repotting: The Soil Mix To Use & Steps To Take
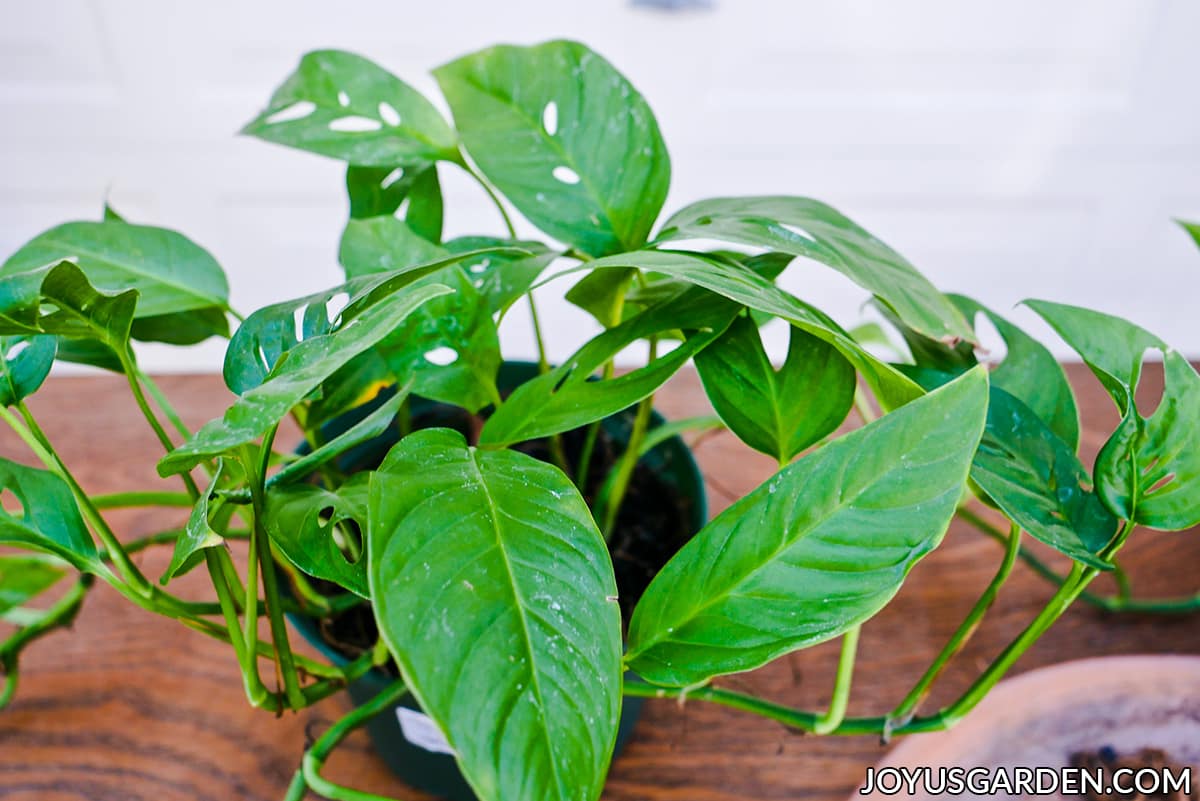
Monstera Adansonii, or Swiss Cheese Vine, has lacy leaves and is quite the popular houseplant these days. It’s the cousin of the Monstera delicosa, or Swiss Cheese Plant, which is favored for its huge leaves and ease of care. Here you’ll learn about Monstera adansonii repotting including the mix to use, when to do it, the steps to take, and things good to know so yours will grow healthy and strong.
The 2 Monsteras share something besides a genus name which is that they both climb up other plants in their natural environments. The deliciosa has robust leaves and stems and ultimately gets much bigger. The adansonii has much smaller leaves and thinner stems. It can climb or trail and I’ll be training mine to do both.
Time of year for repotting Monstera adansonii
Spring, summer, and into early fall are good times for repotting a Monstera adansonii. If you live in a climate where winter comes early, then spring and summer will be best. I live in Tucson, AZ where fall is warm so I repot through the end of October.
HEAD’S UP: I’ve done a general guide to repotting plants geared for beginning gardeners which you’ll find helpful.
Soil mix to use
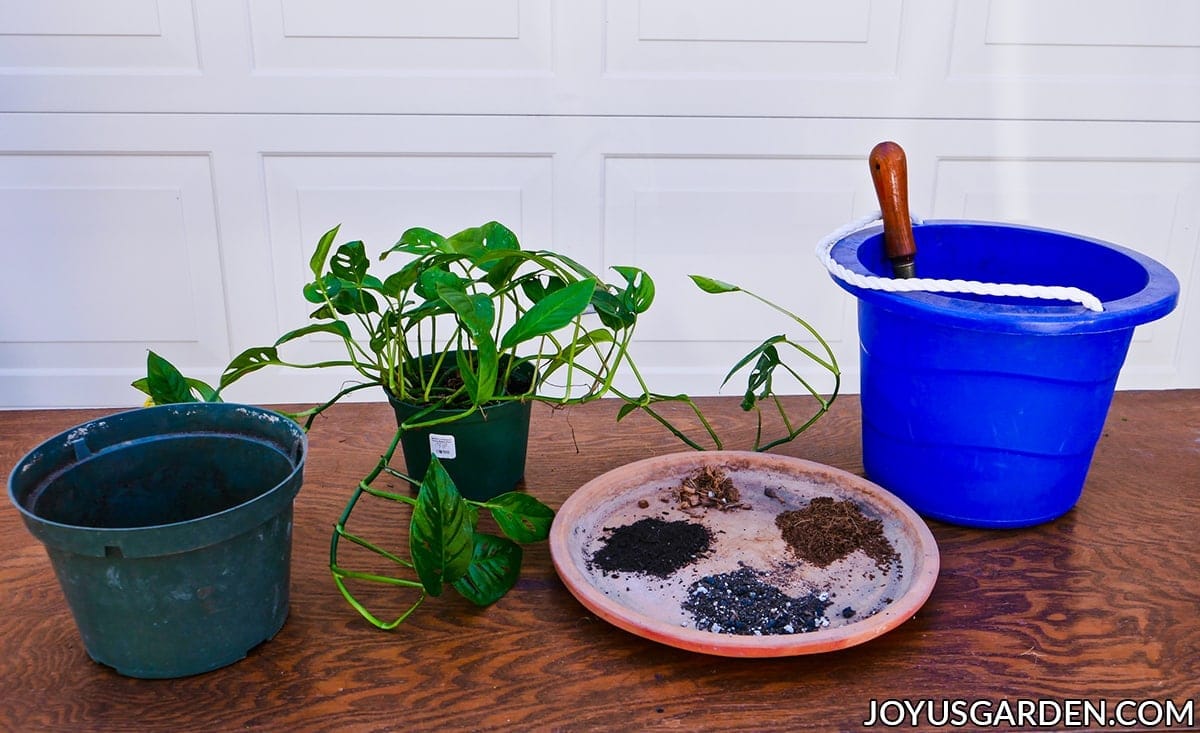
Note: This is the optimum mix to use for a Monstera adansonii. I have many plants (both indoors and outdoors) and do a lot of repotting so I have a variety of materials on hand at all times. Plus, I have plenty of room in my garage cabinets to store all the bags and pails. If you have limited space, I give you a few alternative mixes down below which consist of 2 materials.
Monstera adansoniis like a mix rich in peat which is well-drained. I prefer to use coco fiber which is similar but is a more sustainable alternative to peat moss along with compost.
Monsteras grow on the bottom of the tropical rainforest floor and this mix mimics the rich plant materials which fall on them from above and provide the nourishment they need.
This is the mix I used with approximate measurements:
- 1/2 potting soil. I alternate between Ocean Forest & Happy Frog.
- 1/2 coco fiber.
- I added in a few handfuls of coco chips (similar to orchid bark) and a few handfuls of compost.
- I end by top dressing with a 1/4 1/2″ layer of worm compost.
3 alternate mixes:
- 1/2 potting soil, 1/2 orchid bark or coco chips OR
- 3/4 potting soil, 1/4 pumice or perlite OR
- 1/2 potting soil, 1/2 coco fiber or peat moss
Pot size to use
Monstera adansoniis can grow slightly tight in their pots but will eventually do and grow better with a pot size that is larger.
You can go up 1 pot size if you’d like; for instance from a 6″ pot to an 8″. They grow fast so if the plant and pot are in scale, going from a 6″ pot to a 10″ pot would be fine.
Mine went from a 6″ to an 8 1/2″ grow pot. 8″ is the usual size but I happened to have an 8 1/2″ pot laying around from a previous repotting adventure.
Some Of Our General Houseplant Guides For Your Reference:
- Guide To Watering Indoor Plants
- Beginner’s Guide To Repotting Plants
- 3 Ways To Successfully Fertilize Indoor Plants
- How to Clean Houseplants
- Winter Houseplant Care Guide
- Plant Humidity: How I Increase Humidity For Houseplants
- Buying Houseplants: 14 Tips For Indoor Gardening Newbies
- 11 Pet-Friendly Houseplants
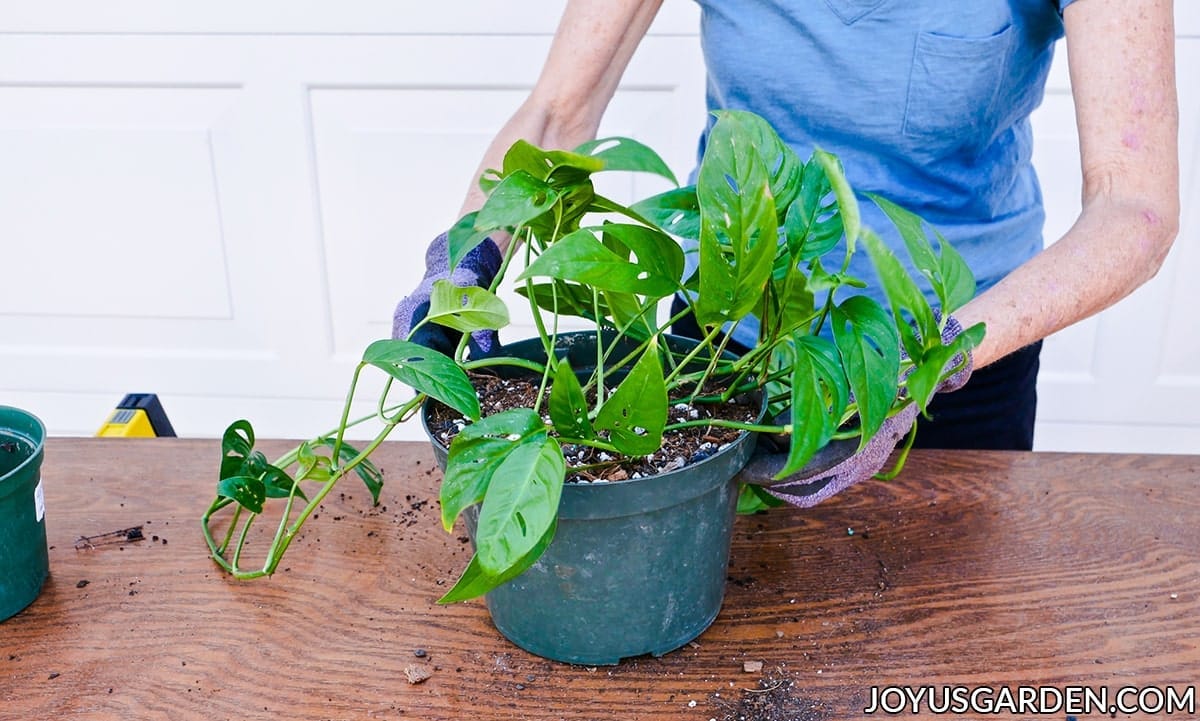
At the work table for my Monstera adansonii repotting:
How to Repot Monstera adanonsii
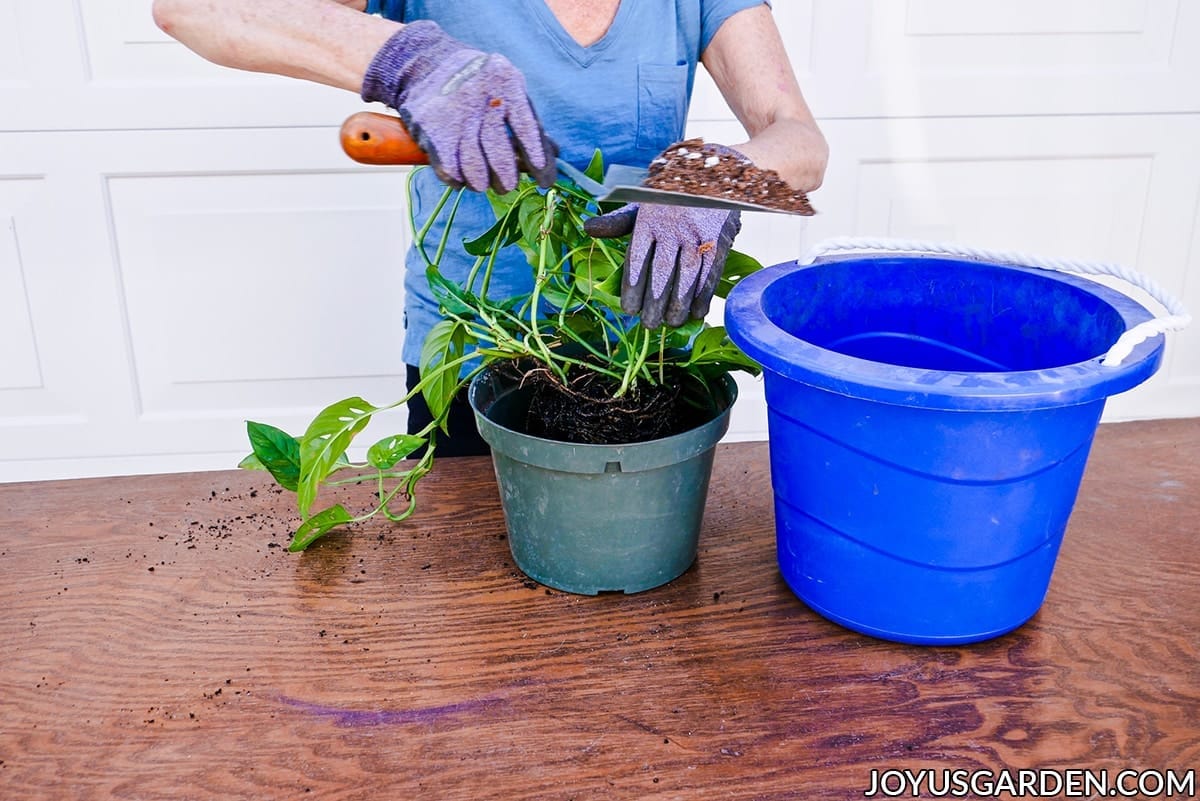
I watered it a couple of days before the repotting. A dry plant is stressed so I make sure my houseplants are watered 2- 4 days in advance. I find that if I water the day of, the soil can be too soggy making the process a bit more messy than it already is.
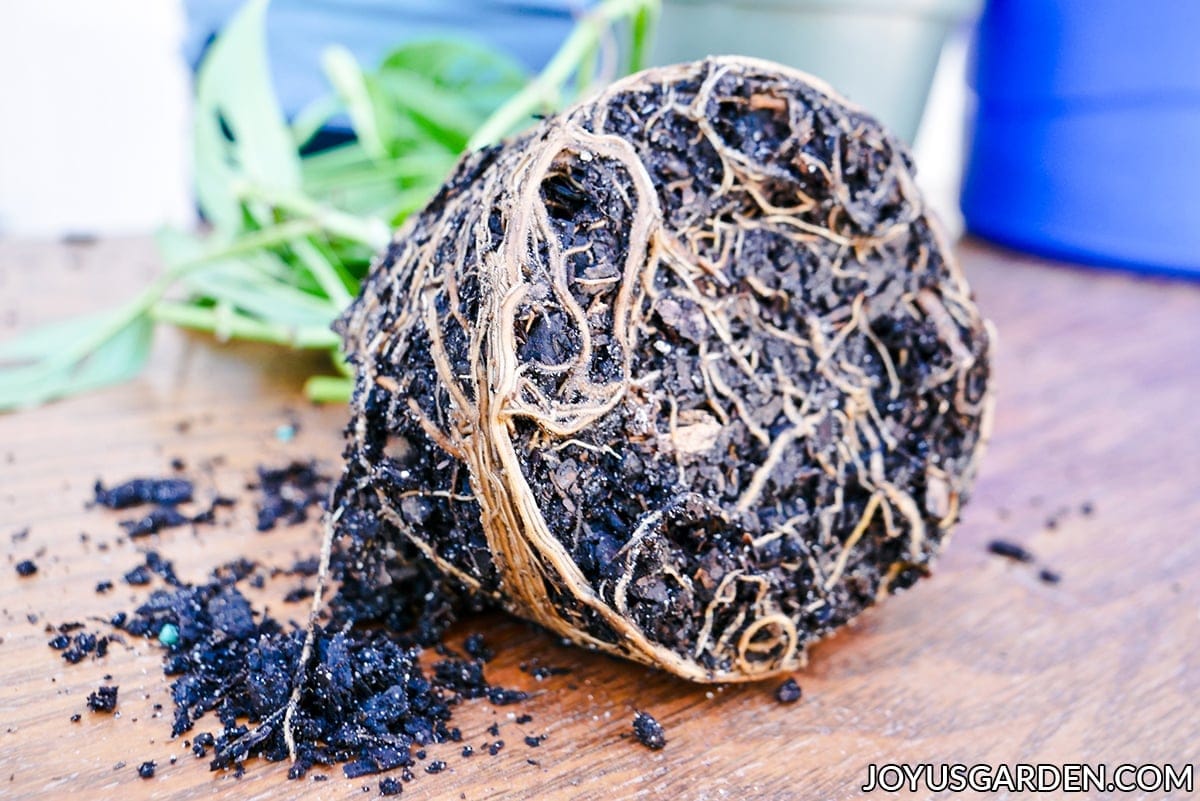
To remove the Monstera from the pot, I laid it on its side and gently pressed on the grow pot. If it’s being stubborn, you may have to run a knife along the edge of the root ball to loosen it. I’ve also cut grow pots if the root ball is tight and the plant won’t pull out.
Gently massage the roots to loosen so you can pull them apart a bit. The roots were wrapped around at the bottom so this helps them find their way out of the tangled root ball. They’ll grow out eventually but this gives them a head start.
Put enough the mix in the pot so that the top of the root ball is about 1/2″ below the top of the pot.
Fill in around the root ball with the mix. I tamped the soil down between the root ball and sides of the pot to get the plant to stand up straight.
Top with a 1/4″ layer worm compost.
Note: I put the root ball towards the front of the pot, not in the center like I normally would. And, I didn’t fill in with soil in the back 1/3 so I could more easily get the trellis in. More on that in the next post and video.
After care
This is straightforward and easy. Water your Monstera adansonii well after the repotting/transplanting. I then put mine back in its bright spot in the living room where it had been growing near an east window.
You don’t want to let the soil completely dry out while the plant is settling in. How often you’ll water yours depends on these factors: the mix, the size of the pot, and the conditions it’s growing in.
It’s hot in Tucson now so I’ll probably water my newly repotted Monstera adansonii every 7 days until the weather cools. I’ll see how fast it’s drying out in the new mix and bigger pot but once a week sounds about right.
You might find this helpful: A Guide to Watering Indoor Plants
Repotting Swiss Cheese Vine FAQs
They can grow a bit tight in their pots but will do better in a larger one with more room for the roots to spread out. My general rule is when the roots are coming out or showing at the bottom, it’s time. You can always take it out of the pot and look at the root ball.
Also, if your plant is looking stressed, one of the causes may be it needs a bigger pot.
There are a few ways. You can use a moss pole, a trellis or a piece of bark. I made a trellis out of moss-covered poles for mine to climb up.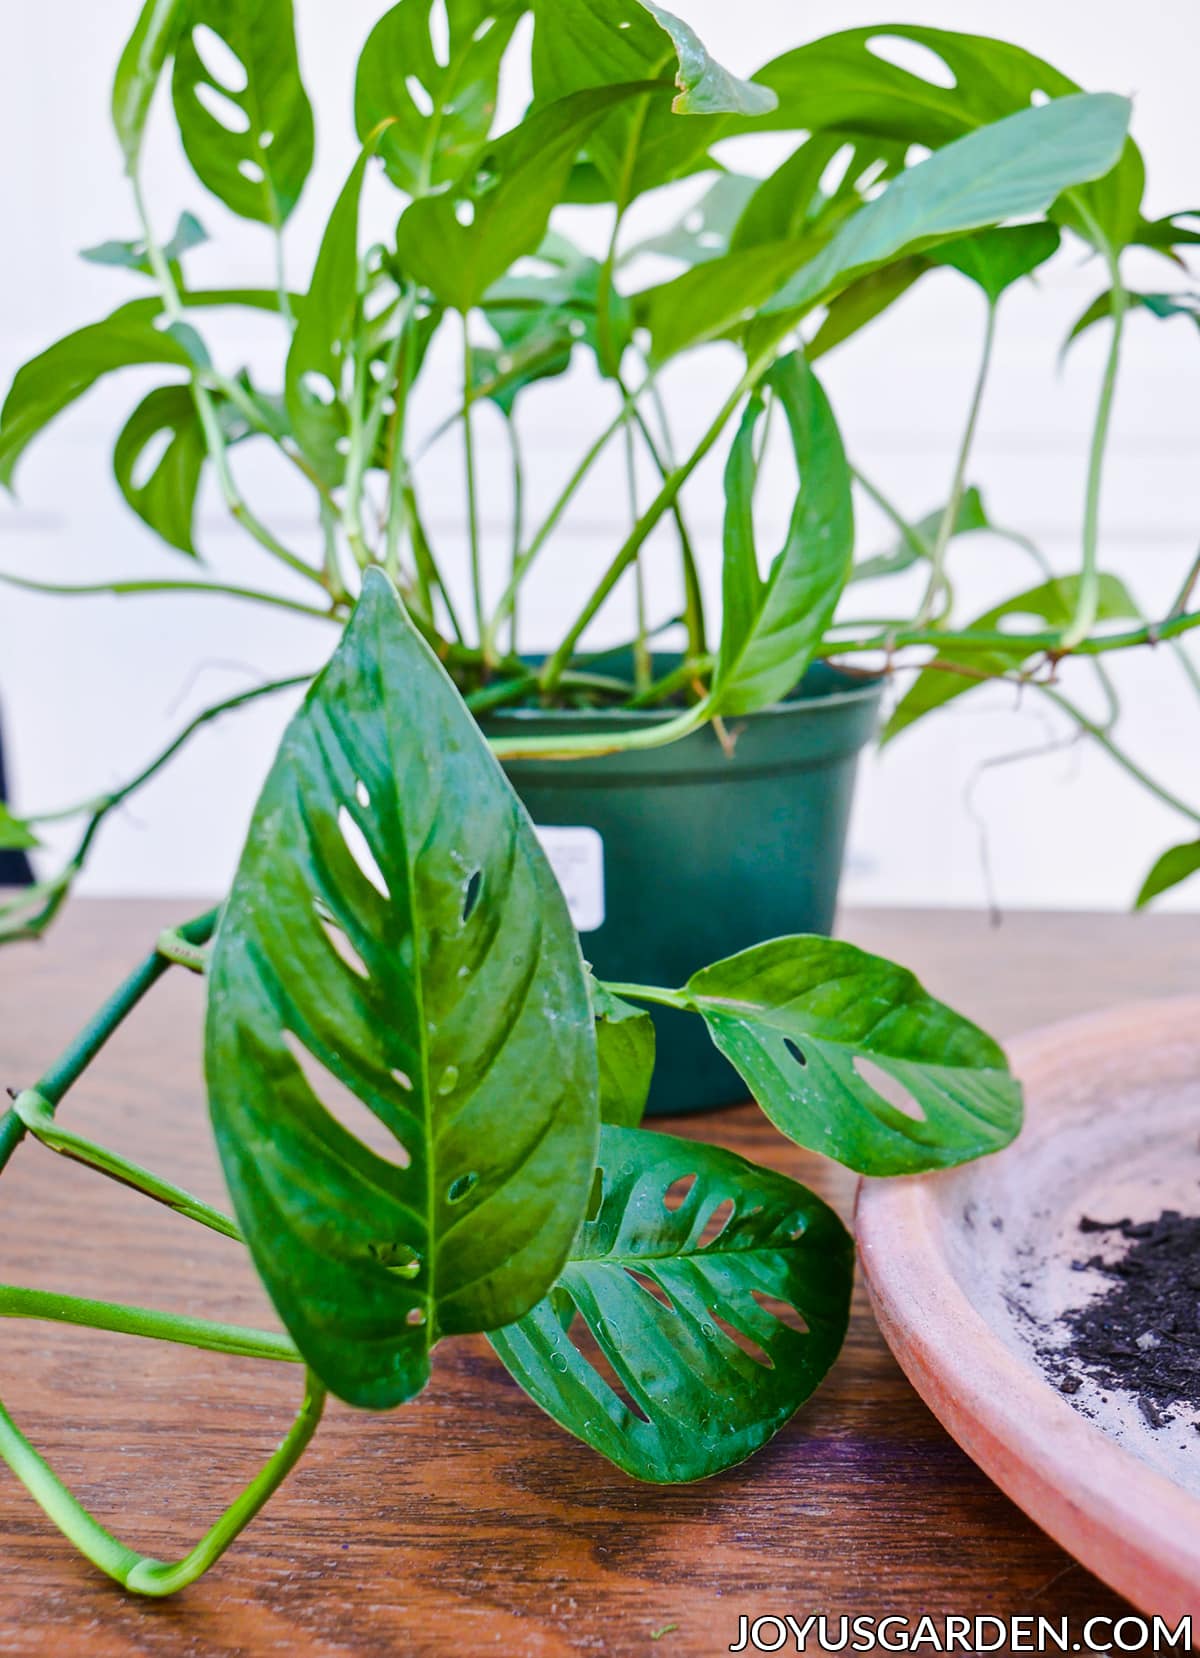
Yes, mine has grown fast in the warm months. I constructed a 2′ trellis out of moss-covered poles & 8 weeks later it’s already time to extend the trellis with 3′ poles.
In general, Monsteras prefer a bigger pot as they age because they have robust roots that need room to grow.
My Monstera adansonii is very happy after its repotting and growing like crazy during these warm, sun-filled days. If yours needs repotting, give it a go because it’s easy to do!
Happy gardening,

More repotting guides for you!
- Repotting Jade Plants
- Repotting Hoya Houseplants
- Repotting Monstera Deliciosa
- Hanging Plants For Beginning Houseplant Gardeners
- About the Author
- Latest Posts

Nell, the founder of Joy Us garden, was born into a gardening family and grew up in Connecticut’s countryside. After living in Boston, New York, San Francisco, & Santa Barbara, she now calls the Arizona desert home. She studied horticulture & garden design, working in the field all her life. Nell is a gardener, designer, blogger, Youtube creator, & author. She’s been gardening for a very long time & wants to share what she’s learned with you.

Hi Nell,
Thank you so much for this post! My adansonii is looking a bit cramped, so hopefully repotting will help it thrive.
I was hoping you could do general care post about the monstera adansonii as well (I’m sorry if it exists and I just missed it!). Some of the leaves on my monstera are turning a muddled yellow color, and I’m also getting some brown spots on the edges on the leaves – if you have any ideas what could be causing this I would be so thankful!
You’re welcome Eri! I have Monstera adansonii care on my list of posts to do this fall so stay tuned. It could be a watering issue (under but more commonly over) or too much fertilizer. Nell
Hi Mel,
My Sweet cheese plant was in the sun a little bit too long and the leaves look like burnt/ slightly turned yellow (not too bad). I moved it into the shade, but can I do anything about it? or I lost it the plant?
Thank you,
Mahsa
Hi Mahsa – Once the leaves are blemished, they won’t turn back. If the burn isn’t bad as you say, the plant will recover. You may have to do some pruning in spring. Nell