Repotting Monstera: How To Repot A Monstera Deliciosa
Is your Swiss Cheese Plant outgrowing its pot? This beautiful plant with large, exotic leaves will add a tropical vibe to any home. Learn about repotting Monstera, including the mix to use, when to do it, steps to take, aftercare, and other things good to know.
Monstera deliciosa, aka Swiss Cheese Plant, is a very popular houseplant with a vigorous growth habit. It has a tough and extensive root system that appreciates room to grow.
With that in mind, you’ll need to repot your Monstera at some point. This isn’t hard to do, especially when the plant is smaller. You may need to add some support for it to grow up (more on that in the FAQs) as it grows larger.
- Botanic Name: Monstera deliciosa
- Common Names: Monstera, Swiss Cheese Plant, Monstera Split-Leaf Philodendron, Cut Leaf Philodendron & Mexican Breadfruit
This post may contain affiliate links, you can read our policies here.
Repotting Monstera: A Swiss Cheese Plant Repotting Guide
When To Repot a Monstera
Regarding the time of the year, early spring through early fall is the best. Spring and summer are best if you live in a climate where winter comes early. Here in Tucson, fall is mild – I repot until the end of October.
It’s best to avoid repotting in winter if possible because it’s not the active growing season for plants. By the way, I repotted this one in mid-April.
Monstera Deliciosa Soil
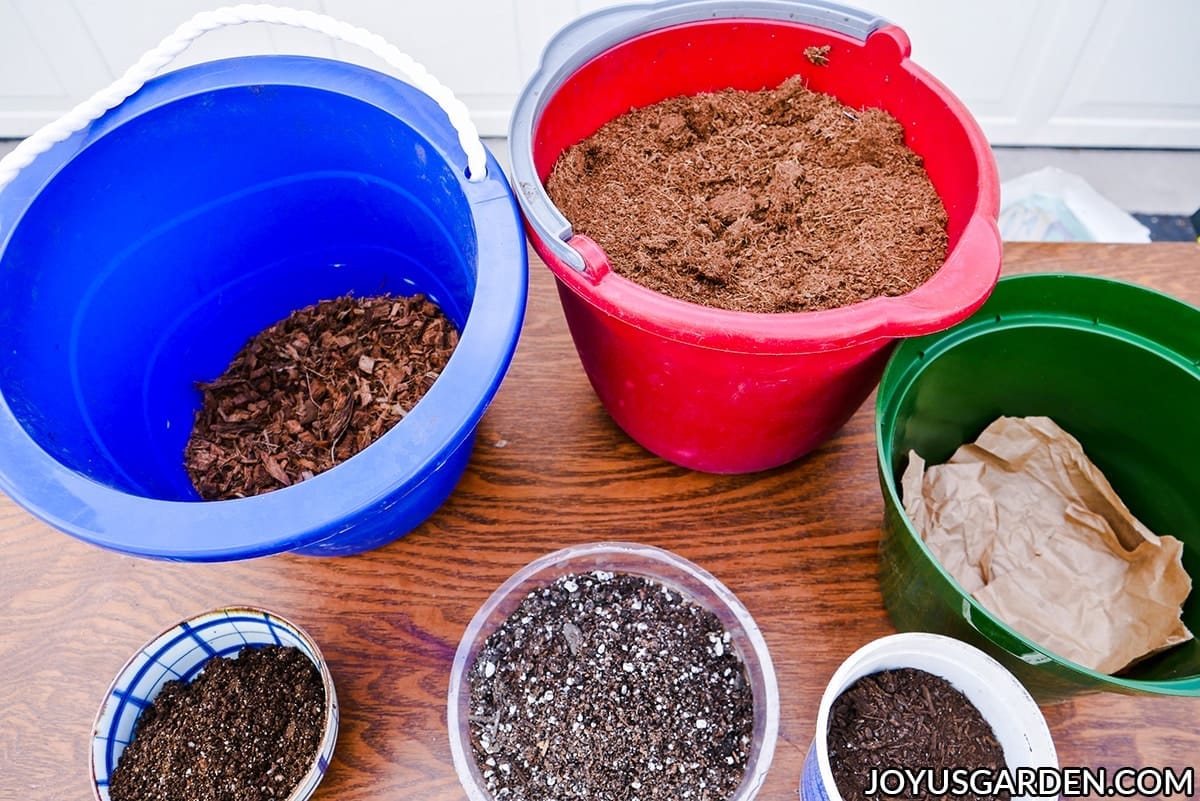
All plants appreciate fresh potting mix at some point. Monsteras like a well-drained mix rich in peat (I use coco coir instead; it’s a similar but more sustainable alternative to peat moss) and organic matter.
They grow on the bottom of the tropical rainforest floor, and this mix mimics the plant materials that fall on them from above and provides the nourishment they need.
Note: This is the optimum mix I use for a Monstera deliciosa plant. I have many plants (indoors and outdoors) and do a lot of repotting. The third bay of my garage is dedicated to storing all my plant materials and tools. If you have limited space, I give you three alternative mixes using fewer materials below.
This is the mix I use is rich and yields good drainage to prevent root rot. Here are the approximate measurements:
- 1/2 potting soil. I alternate between Ocean Forest & Happy Frog, and sometimes I mix them. These soilless potting mixes contain high-quality ingredients and also drain well.
- 1/2 coco coir. This is an environmentally friendly alternative to peat moss and helps to improve soil structure.
- I added a few handfuls of coco chips (these add aeration and aid in drainage) and a few handfuls of local compost.
- I end by top dressing with a 1/2″ layer of worm compost & compost (both add nutrients).
Alternatives mixes:
- 1/2 potting soil, 1/2 coco fiber or peat moss
- 1/2 potting soil, 1/2 orchid bark, or coco chips
- 3/4 potting soil, 1/4 pumice or perlite
Monstera Pot Size
Monsteras can grow tight in their pots but will eventually do and grow better with a larger pot size.
You can go up one pot size if you’d like, for instance, if the current pot is 6″ to 8″. That’s fine with a smaller plant.
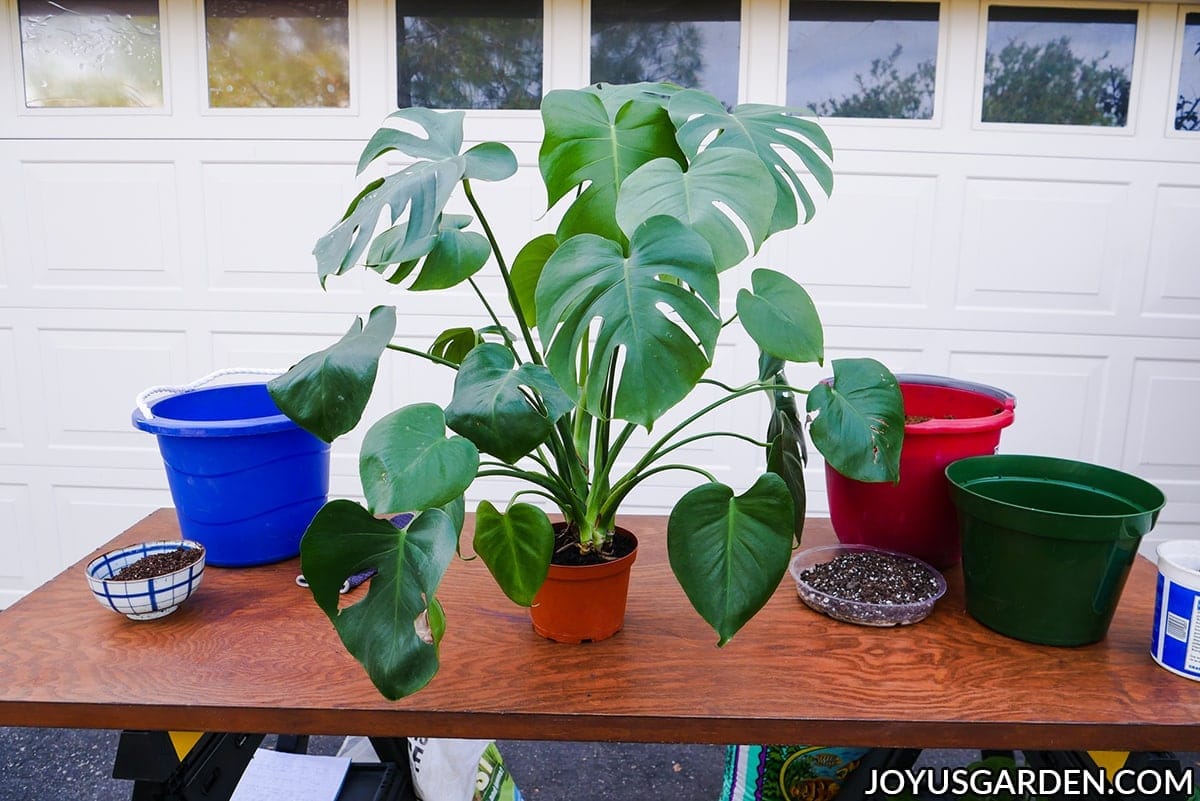
Because mine was growing so fast (it loves the warm weather here in Tucson) and the bottom of the pot was cracked, I decided to give it plenty of room. Mine went from a 6″ to a 10″ grow pot.
Mature plants will need a bigger pot because they get heavier, wider, and taller as they grow. Almost four years later, mine is ready to go from that 10″ pot into a 14″ pot. Honestly, it’s overdue by about a year!
Make sure the pot has plenty of drainage holes so the excess water can flow out the bottom. This prevents root rot.
Steps To Repotting A Monstera Deliciosa
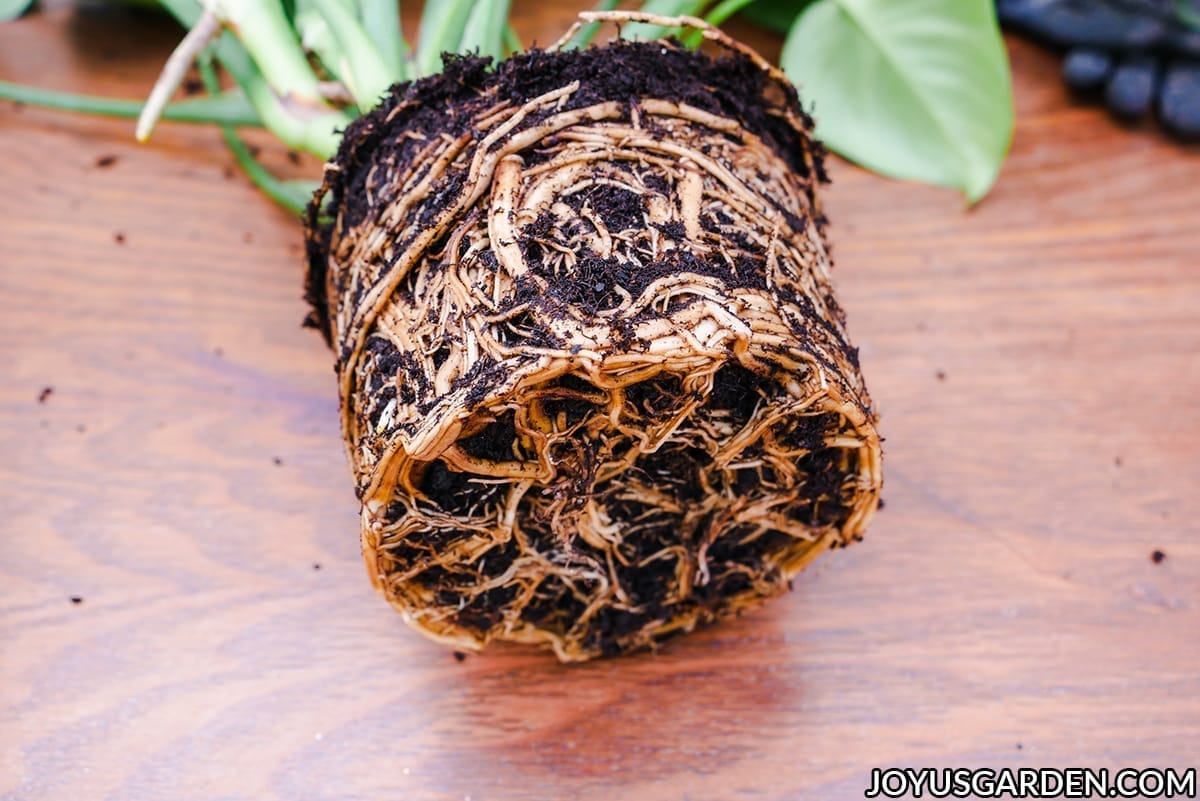
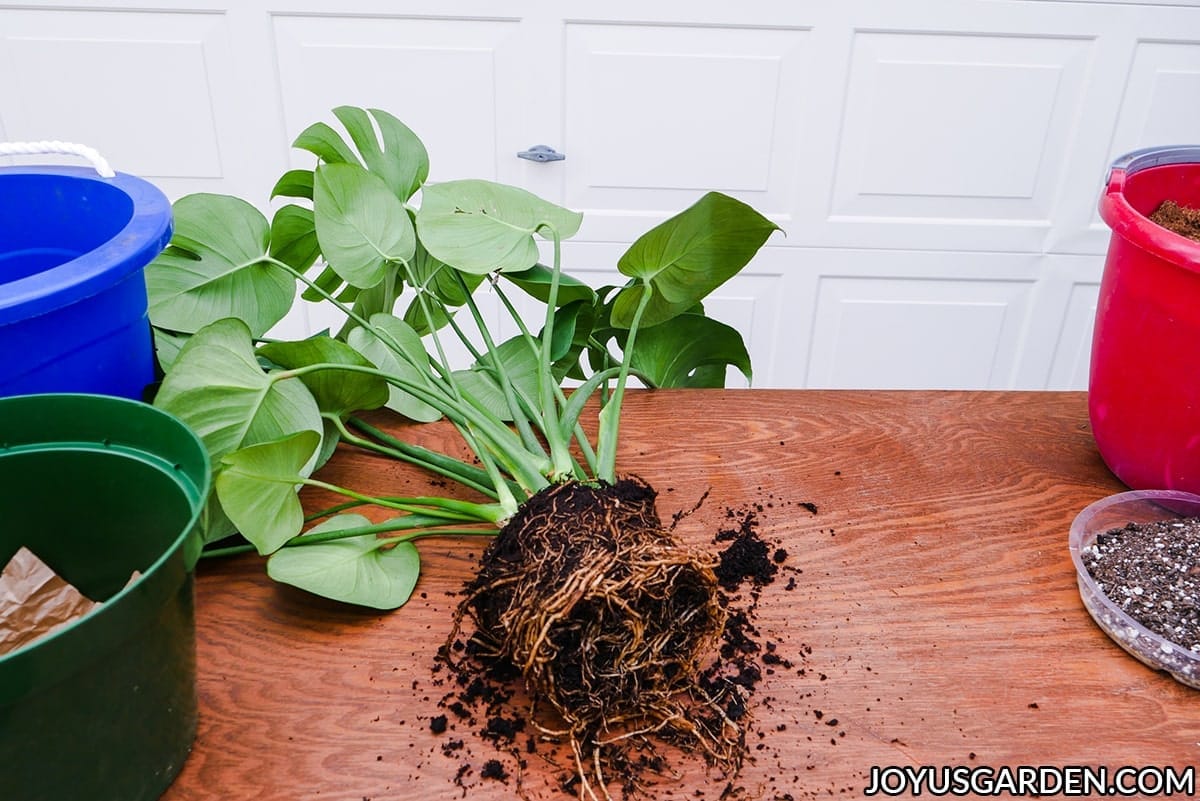
Gently massage the Monstera roots to loosen them a bit. The roots will eventually find their way out of the tangled root ball, which gives them a head start.
Put enough of the new potting mix in the pot so that the top of the root ball is about 1/2″ below the top of the pot.
Fill around the root ball with the mix, adding a few handfuls of compost. I tamped the soil between the root ball and the sides of the pot to get the plant to stand up straight.
I topped it all with a 1/2″ layer of compost and worm compost.
If you’re a beginning gardener, you’ll want to check our Guide To Repotting Plants for the basics.
Repotting Monstera Video Guide
Monstera Plant Care After Repotting
It’s simple! I watered my Monstera well after the repotting process. I then put it back in the bright spot (indirect sunlight) in the living room by a large north-facing picture window.
You don’t want to let the soil completely dry while the plant settles in. How often you’ll water yours depends on the soil mix’s composition, the pot’s size, and the conditions it’s growing in.
When I did this repotting, it was hot in Tucson, so I watered my newly repotted Monstera every seven days until the weather cooled. You can see how fast yours is drying out in the new mix, bigger pot, and water accordingly.
Remember, even though the top of the soil is dry, it could be wet further down where most of the roots are. A moisture meter might help you out with this. I use this one for all my larger plants.
Are you interested in Swiss Cheese growing tips? Check out this Monstera Deliciosa Care Guide

Repotting Monstera FAQs
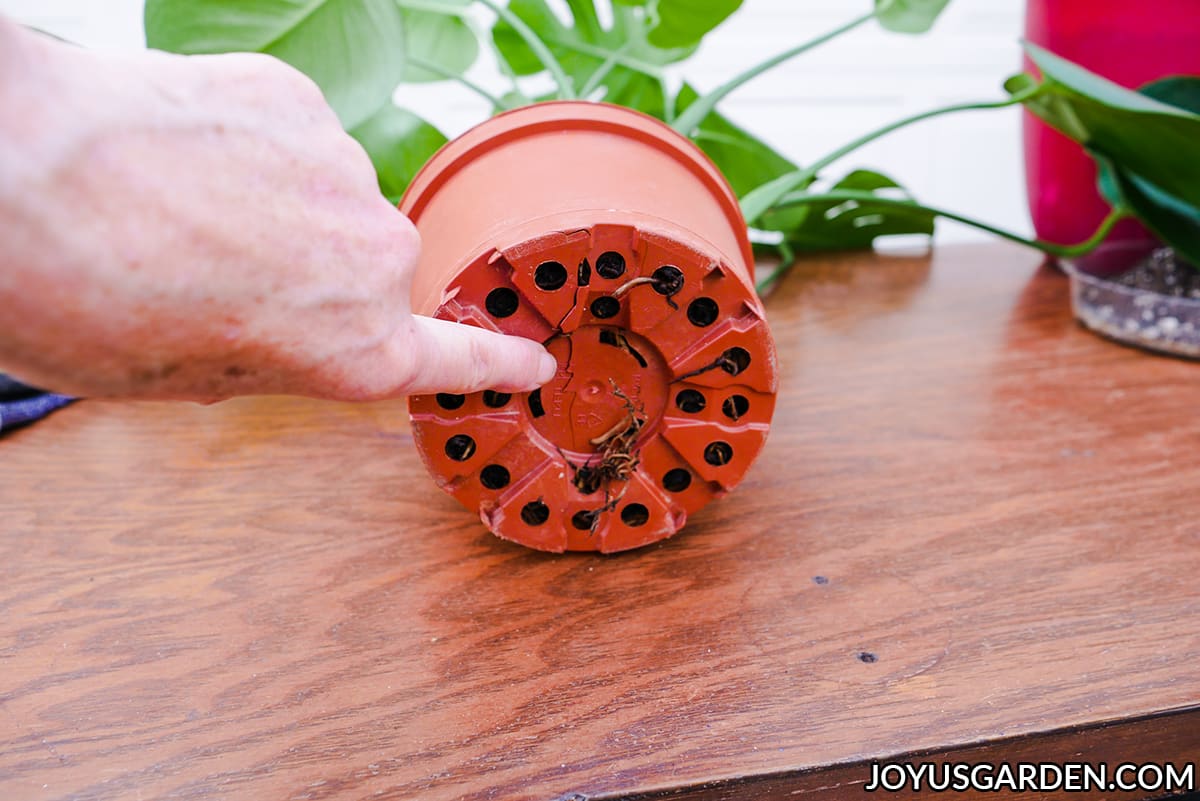
I do it when the roots are showing out the bottom. Although they don’t mind growing tight in their pots, they’ll uptake water and nutrients better if their root can spread out and grow.
Every 2-4 years is a good time frame to follow, depending on the conditions your Monstera is growing in and its size.
As for the time of year, during the growing season is best. That’s spring and summer; early fall if you’re in a more temperate climate.
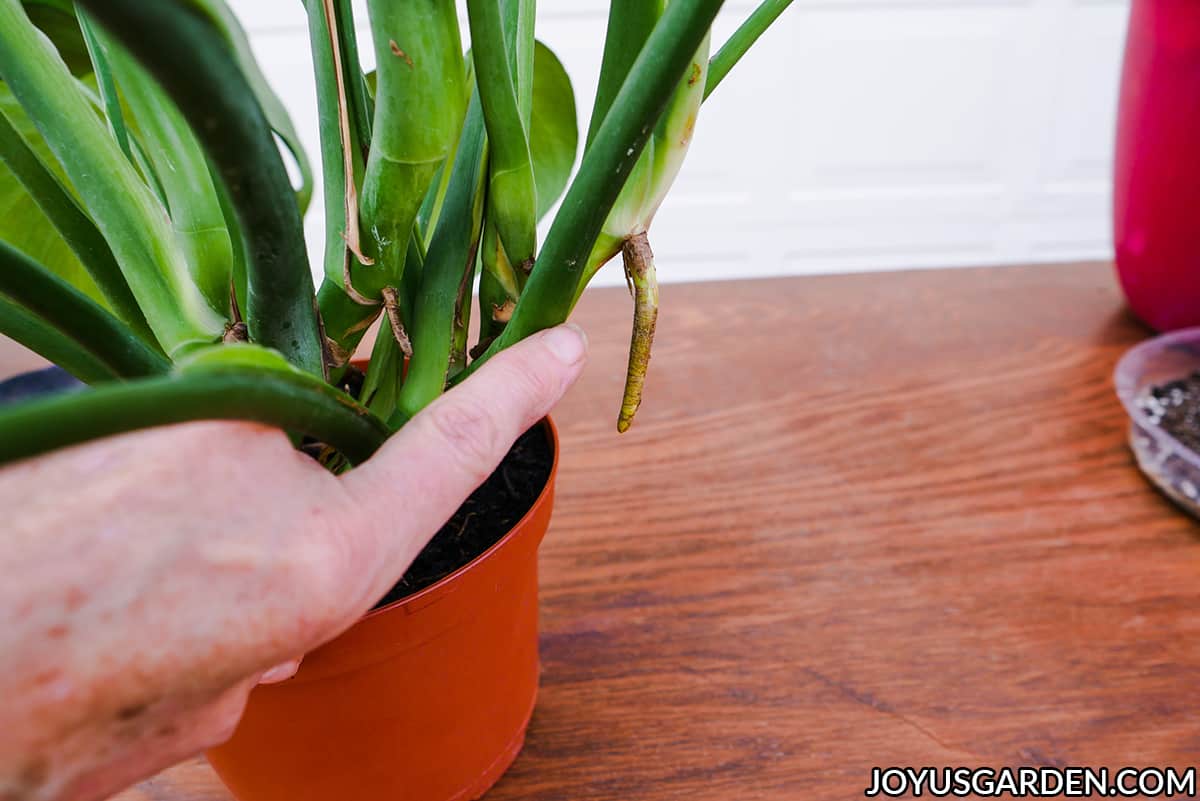
A large plant will typically have many of them. You repot one with aerial roots following the steps above. If the roots are in the way, you can tie them together to make it easier. Or, you can trim them or remove them.
I leave most of them on, selectively trimming off a few because they don’t bother me. I’ve been told that removing all of the aerial roots will slow the growth. I’m unsure if this is true because I’ve never done it!
I massage them apart. You may have to cut into a very tight root ball a bit. I’ve cut the bottom couple of inches off of landscape plant rootballs because the roots were like a solid mass.
This plant likes a rich soil mix that is well-draining and well-aerated.
It depends on the size of the plant. Larger plants will need a deeper pot as an anchor because of their weight and size. Young Monstera plants don’t need one.
These tropical plants grow to 50′ tall in their natural environments. They start out in the ground and eventually spend a part of their lives growing up trees. That’s what the aerial roots (see pic above) are for – they grab onto the bark so the plant can climb.
Even in our homes, those roots will eventually need something to grab onto as the plant takes off and grows upwards. Otherwise, the stems that are getting longer and heavier will flop. Mine didn’t need it this go-round as it was smaller, but when I repot it again next spring.
Many people use a moss pole (often called a coir pole), but I’ll use a piece of wood with sphagnum moss attached for mine to grow up because it’s bigger now.
In conclusion, repotting a Monstera plant is essential to its growth and overall health. Providing a larger container with new soil gives the roots room to expand and ensures proper drainage and nutrient availability.
I love my Monstera, so I’m happy to give it room to grow. Follow these guidelines (especially if you’re a beginning gardener), and your Swiss Cheese Plant will thank you!
Happy gardening,

- About the Author
- Latest Posts

Nell, the founder of Joy Us garden, was born into a gardening family and grew up in Connecticut’s countryside. After living in Boston, New York, San Francisco, & Santa Barbara, she now calls the Arizona desert home. She studied horticulture & garden design, working in the field all her life. Nell is a gardener, designer, blogger, Youtube creator, & author. She’s been gardening for a very long time & wants to share what she’s learned with you.
I’ve recently become the new owner of a few indoor plants that are in bad shape. the previous owner passed away and they were put outside for over a month. I’m great with outdoor plants but have no clue what to do with indoor ones. I hate to let something die if there’s a chance thay can be brought back. I was hoping I could pick your brain and get some suggestions on how to help them come back and thrive. I think they need to be replanted and I’m not sure they’re in the correct soil. If you’d be willing to help I can send you a few pics with more specific questions.
Thanks for any info your able to give me.
My monstera is 6.5 ft.tall and the last leaf was 26 inches long g and had 49 holes (not including splits).
I need to repot it (least time was 3 years ago).
my question is, can I take of a few of the bottom leaves and plant it deeper?
Thank you, Laurie~