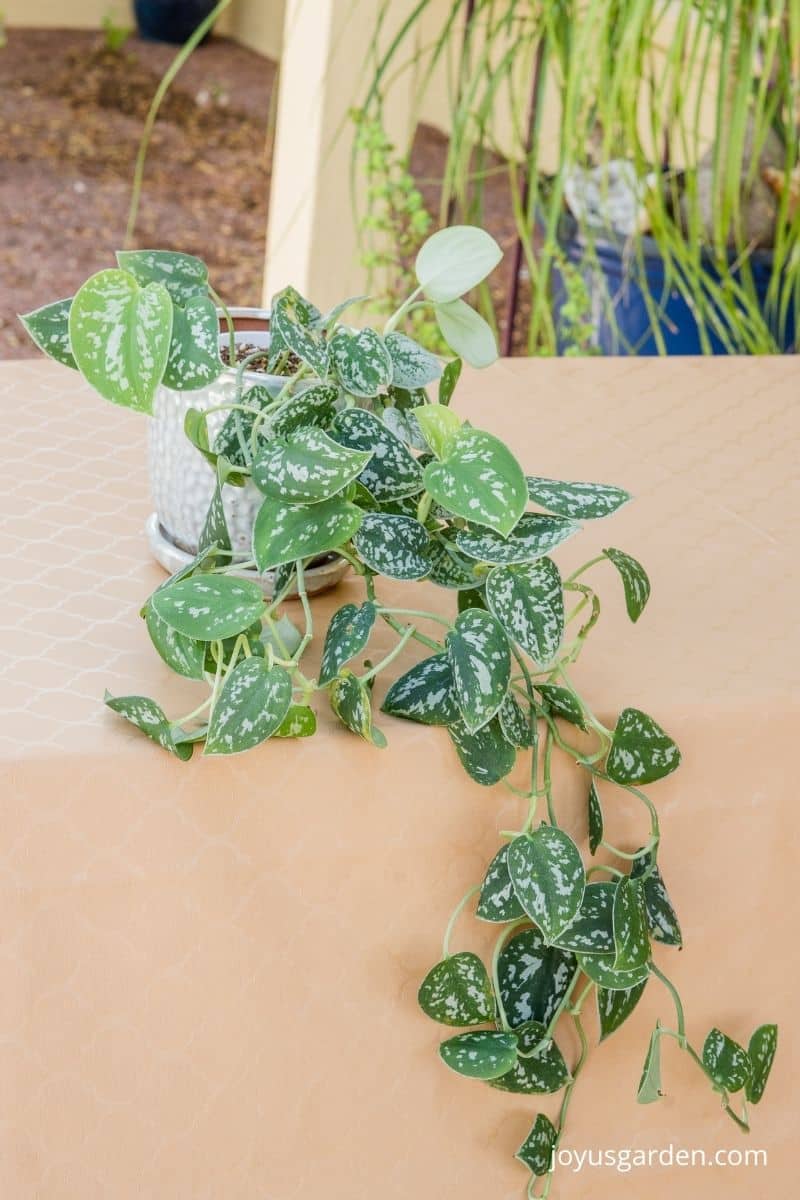
Scindapsus Pictus Repotting: How to Repot Satin Pothos
Satin Pothos is a sweet little vining houseplant with a slow to moderate growth rate. It doesn’t grow fast, but yours will need a bigger pot at some point. This is all about Scindapsus pictus repotting including when to do it, the soil mix to use, steps to take, and the aftercare.
Before we get started on the repotting details, I want to share with you a few names this plant this plant goes by. The full botanic name is Scindapsus pictus “argyraeus” but it’s often seen as just Scindapsus pictus.
Common names include Satin Pothos, Silver Satin Pothos, Silver Pothos, and Silver Vine. Confusing, I know!
Scindapsus pictus’ resemble Pothos plants (Epipremnum aureum) but carry a different genus. They’re in the same plant family so you can think of them as cousins.
Best Time For Scindapsus Pictus Repotting
Like all houseplants, spring and/or summer are the best time. If you live in a climate with warmer winters like me in Tucson, then into early fall is fine.
I repotted the one you see here in early September.
In a nutshell, you want to get the repotting done at least 6 weeks before the colder weather sets in. Indoor plants prefer to be left alone in the winter months in terms of repotting and pruning. The roots settle in much better in the warmer months.
HEAD’S UP: I’ve done a general Guide to Repotting Plants geared for beginning gardeners which you’ll find helpful.
Some Of Our General Houseplant Guides For Your Reference:
- Guide To Watering Indoor Plants
- Beginner’s Guide To Repotting Plants
- 3 Ways To Successfully Fertilize Indoor Plants
- How to Clean Houseplants
- Winter Houseplant Care Guide
- Plant Humidity: How I Increase Humidity For Houseplants
- Buying Houseplants: 14 Tips For Indoor Gardening Newbies
- 11 Pet-Friendly Houseplants
Pot Size You’ll Need:
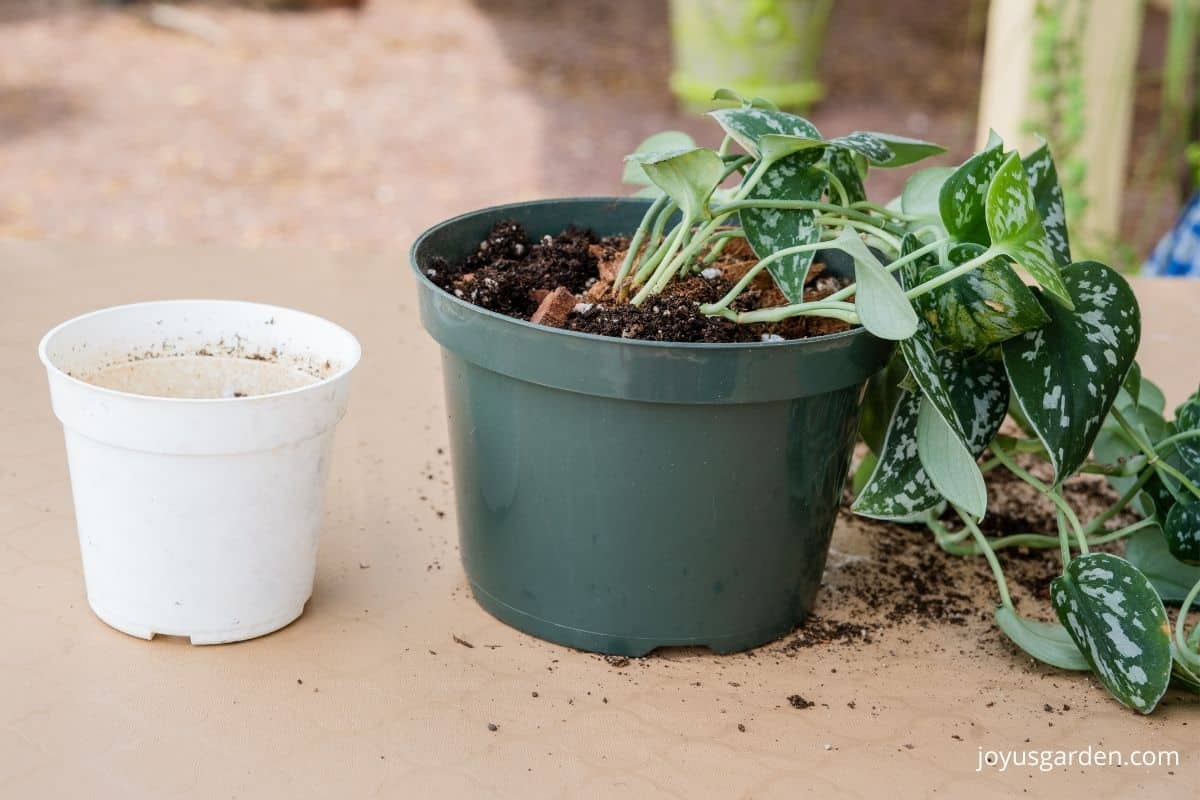
I usually go up one size, for example from a 6″ to 8″ pot. My Scindapsus pictus was in a 4″ and I repotted it into a 6″ grow pot.
Make sure the grow pot or decorative pot you are planting your Satin Pothos into has at least 1 or more drainage holes. You want to make sure the excess water readily drains out.
Soil Mix For Scindapsus Pictus Repotting
Schindapsus aren’t too fussy when it comes to the soil they’re planted in but they do best in a rich, organic potting mix. I always use a good-quality organic potting soil that is peat-based, well-nourished, and provides good drainage. This helps to prevent root rot.
By the way, potting soil doesn’t actually contain soil. Garden soil is way too heavy for houseplants. Make sure whatever mix you buy says it’s formulated for houseplants somewhere on the bag.
Note: This is the optimum potting mix I use for a Monstera minima. I have many tropical plants and succulents (both indoors and outdoors) and do a lot of repotting and planting. I keep a variety of potting materials and amendments on hand on the regular.
The 3rd bay of my garage is dedicated to my addiction to plants. I have a potting bench and shelves and cabinets to store all the bags and pails that hold my soil materials. If you have limited space, I give you a few alternative mixes down below which consist of only 2 materials.
Scindapsus grow on the bottom of the tropical rainforest floor and climb up other plants. This mix I use mimics the rich plant materials which fall on them from above and provide the nourishment they like.
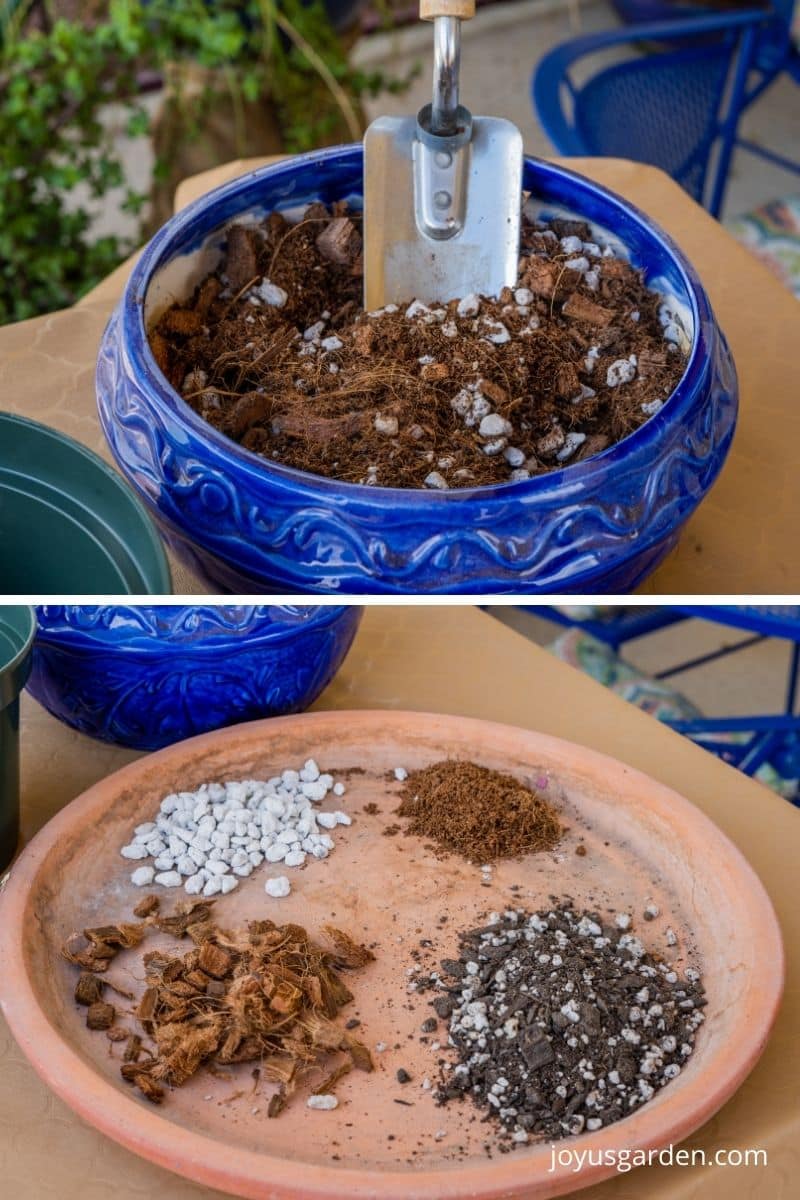
This is the mix I use with approximate measurements:
2/3 Potting soil. I use either Ocean Forest or Happy Frog. Sometimes I mix them together as I did for this project.
1/3 Coco chips, pumice, and coco fiber. The fiber is an environmentally friendly alternative to peat moss. It’s pH neutral, increases nutrient holding capacity, and improves aeration. Satin Pothos like to climb up trees in their native environments so I figure they’ll appreciate the chips and fiber. The pumice just ups the drainage and aeration factors.
I also mixed in a couple of handfuls of compost as I was planting. This is my favorite amendment, which I use sparingly because it’s rich. The blend that I use is a mixture of compost and worm compost that I buy at our Sunday farmer’s market.
I end by top dressing with a 1/4″ layer of the compost blend.
The compost is optional but I always use it. You can read how I feed my houseplants with worm compost and compost here: Compost for Houseplants.
3 alternate mixes that provide a fast-draining soil:
- 1/2 potting soil, 1/2 succulentt & cactus mix
- 1/2 orchid bark or coco chips OR pumice or perlite OR
- 1/2 potting soil, 1/2 coco fiber or peat moss
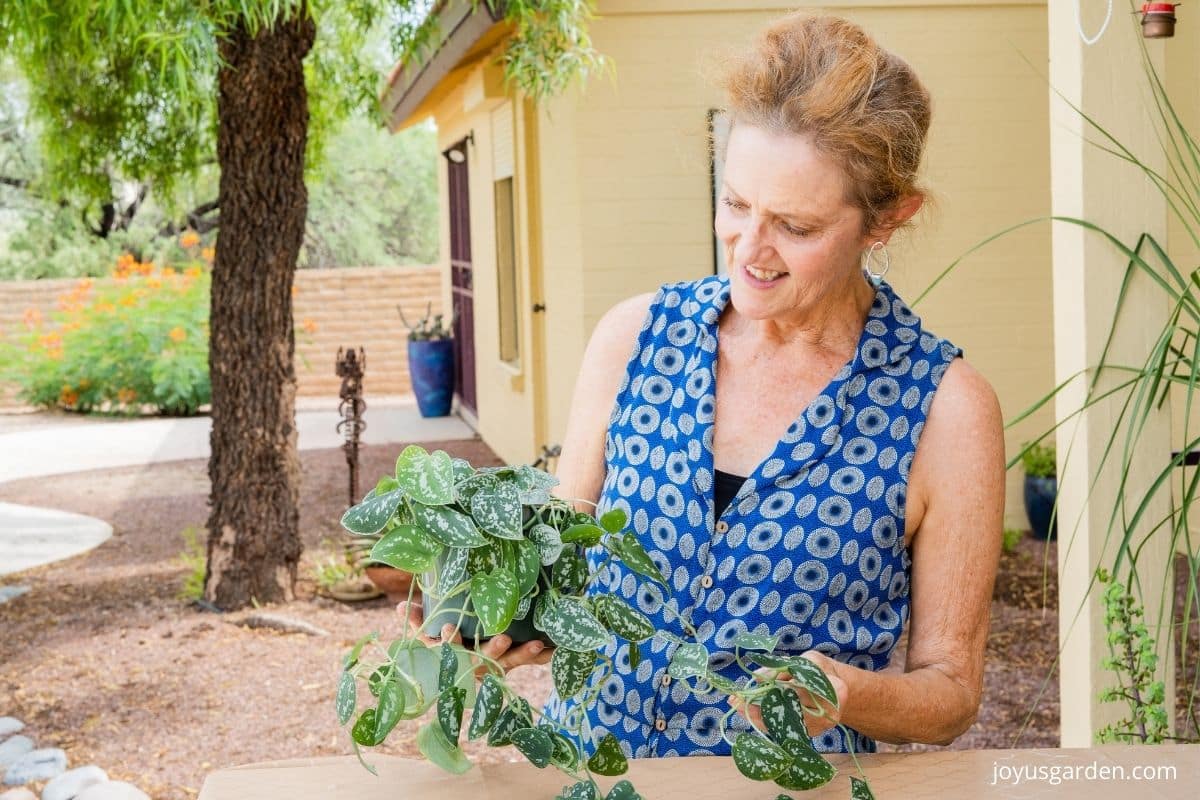
4 Here’s a close-up of the root ball. It wasn’t extremely pot bound but the roots were starting to wrap around the bottom a bit. The plant was really starting to trail so now it’ll be more in scale with the pot.
Scindapsus pictus repotting in action:
How to Repot Satin Pothos
I’d suggest watching the video above to get a better idea.
These are the steps I took:
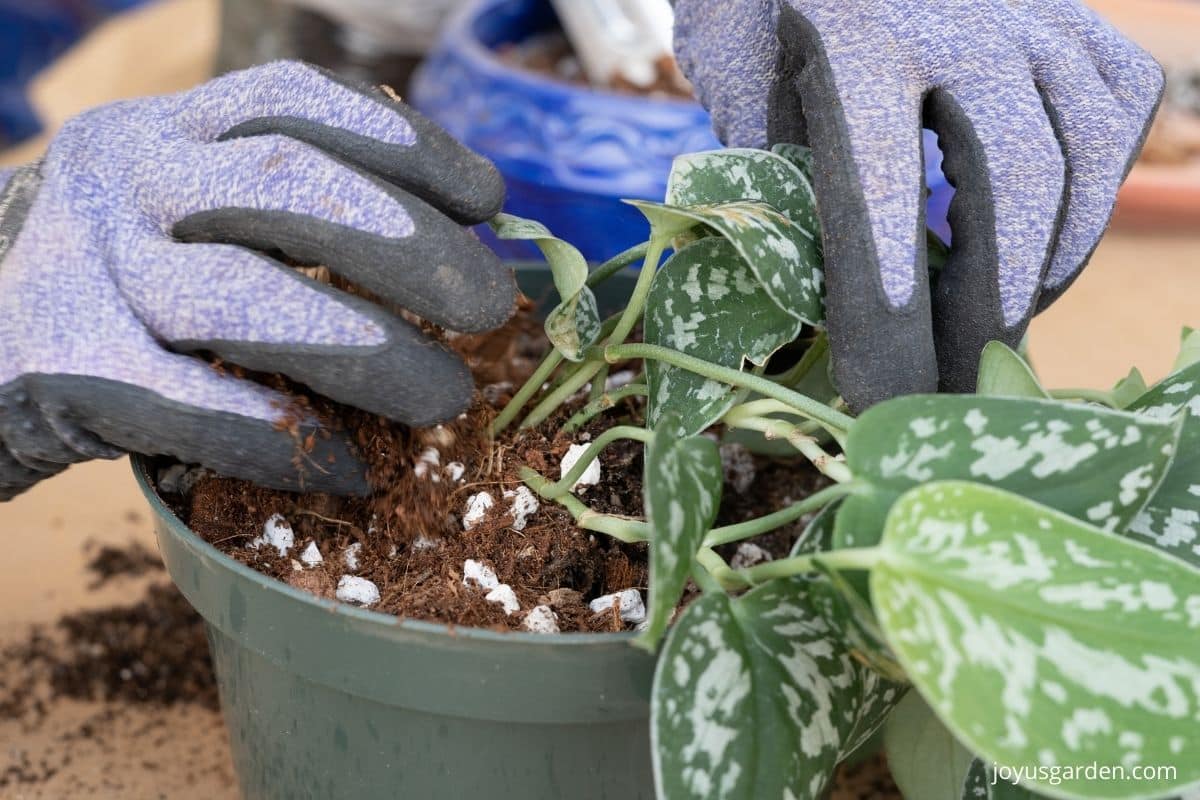
Water the Scindapsus a couple of days before repotting. You don’t want your plant to be dry and stressed during the process. I don’t water a plant just before repotting process because I find soggy soil to be a bit harder to work with.
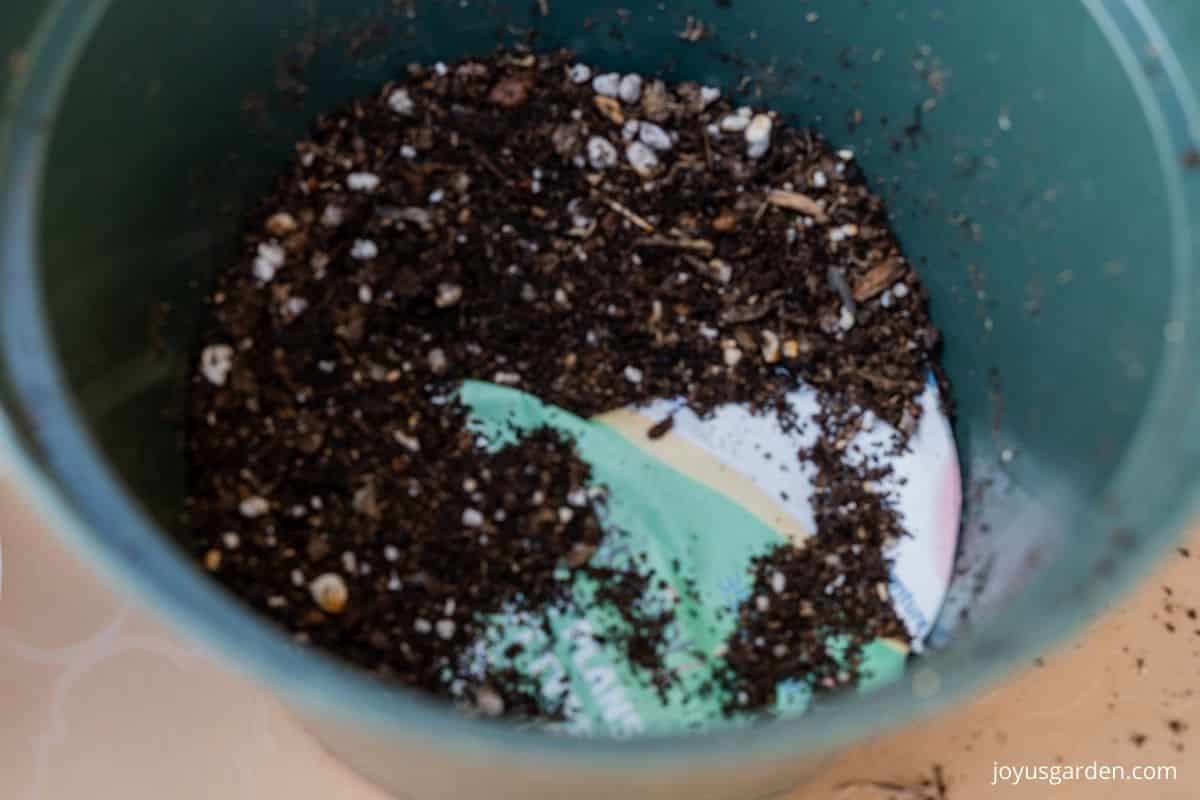
Cover the bottom of the pot with a layer of newspaper. My grow pot had multiple drainage holes and this keeps the fresh mix from flowing out before it gets a chance to settle in.
Gather all the materials so they’re at hand and ready to go.
Gently press on the grow pot to loosen the root ball away. Tip the pot and let the plant slide out. You may have to give it a nudge or run a knife around the perimeter of the pot if it’s being stubborn.
If the soil mix looks old or not suitable, knock as much as you can off the root ball. The soil mix mine was planted in looked fine, so I left most of it on.
Fill the grow pot with the amount of mix required to bring the top of the root ball up even with or slightly below the top of the grow pot. Gently press down on the mix and add more if necessary. If the mix is light like mine, you’ll need to do this.
Note: You may need to add a bit more mix in the coming months if the plant sinks down after repeated waterings.
Place the Satin Pothos in the pot and fill in around with mix and a bit of compost. Top with compost.
How Often Should You Repot Satin Pothos?
They’re slow to moderate growers. If you have yours in low light, the growth rate will be even slower.
I generally repot my Scindapsus every 3-5 years. As the trails grow longer, the roots grow more extensive. I could see the roots through the drain holes of the grow pots of my 2 but they weren’t popping out yet.
Sometimes the mix gets old and needs replenishing. Even if your Satin Pothos isn’t root bound, it’ll appreciate a fresh soil mix after the 3 – 5 year point.

Care After Repotting
This is straightforward and easy. Give your Scinddapsus a good watering after you do the repotting.
I then put mine back in its bright spot in the dining room where it sits about 10′ away from a south-facing window.
You don’t want to let the soil completely dry out while the plant is settling in. How often you’ll water yours depends on these factors: the mix, the size of the pot, and the conditions it’s growing in.
It’s hot in Tucson now so I’ll probably water my newly repotted Satin Pothos every 6 days until the weather cools. I’ll see how fast it’s drying out in the new mix and larger pot, but about once a week sounds about right.
In the winter months, I’ll water less often.
You might find these helpful: Guide to Watering Indoor Plants / Winter Houseplant Care
Scindapsus pictus repotting doesn’t need to be done every year and it’s easy to do. Give it a go at some point and yours will definitely appreciate it.
Happy gardening,

Check out these other repotting guides:
This post may contain affiliate links, you can read our policies here.
- About the Author
- Latest Posts

Nell, the founder of Joy Us garden, was born into a gardening family and grew up in Connecticut’s countryside. After living in Boston, New York, San Francisco, & Santa Barbara, she now calls the Arizona desert home. She studied horticulture & garden design, working in the field all her life. Nell is a gardener, designer, blogger, Youtube creator, & author. She’s been gardening for a very long time & wants to share what she’s learned with you.