What You Need To Create A Spooky Halloween Graveyard
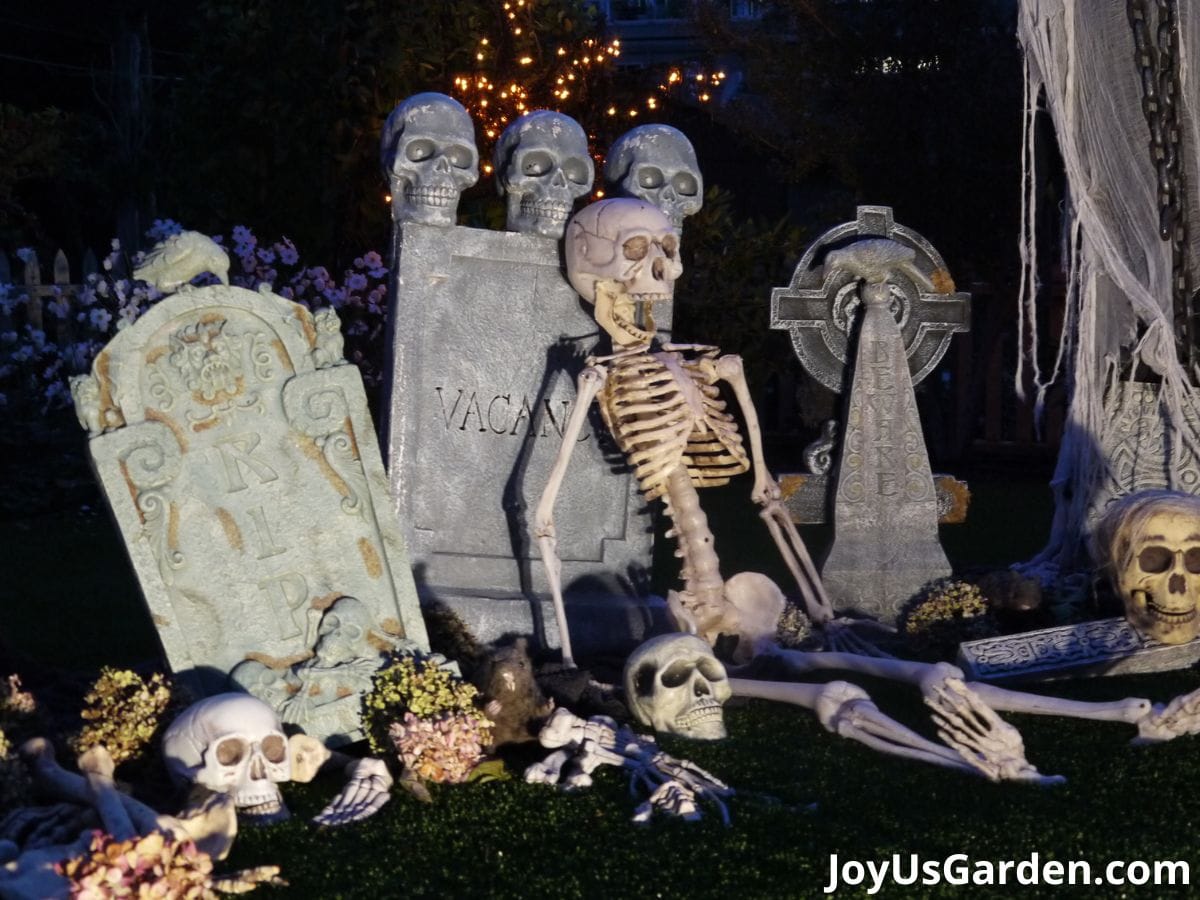
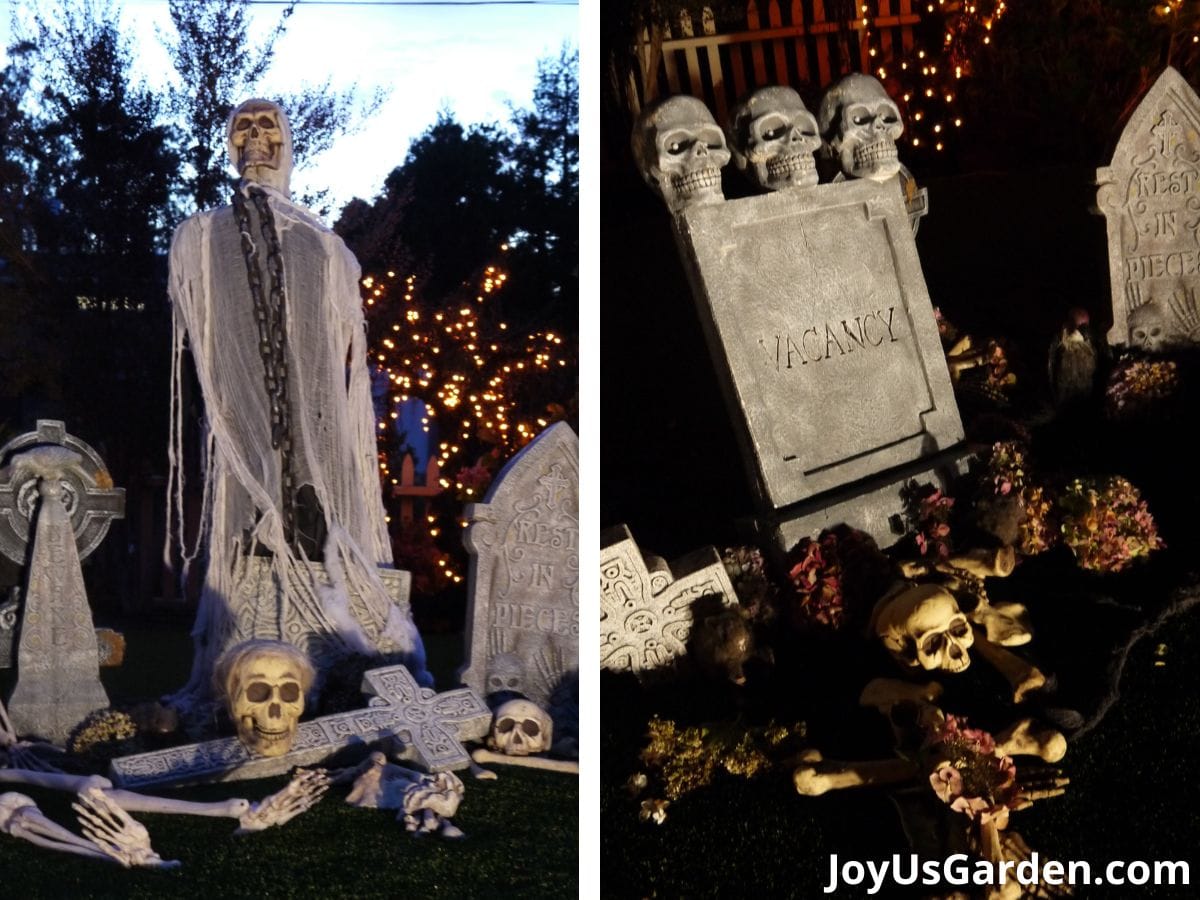
It’s time to get your goblins and ghouls out – Halloween night is fast approaching. I did a large decorating job in the San Francisco Bay area for 23 years, and the Halloween cemetery scene stole the show from all the other displays in the front yard. It’s spooky but not too scary and is a delight to all who see it, especially at night. Here’s how to create a Halloween graveyard scene of your own!
It’s the first thing you see when you enter the front gate, making it quite the spooky entrance. The lady of the house had a big Halloween party every year, and gobs of trick-or-treaters visited, so there are many, many photos taken of and in this DIY Halloween graveyard!
The Halloween graveyard props have been collected and used for years. They’ve been purchased from wholesale display houses as well as from retailers.
Each year a bit was added, and each display is slightly different. Although you may not be able to find exactly what’s been used in this display, I’ve gathered groups of similar pieces found in the collages so you can create a delightfully frightening graveyard too.
This post may contain affiliate links, you can read our policies here.
Halloween Graveyard Ideas
Step By Step Instructions To Create Your Own Halloween Graveyard Decorations
- Gather all your materials close to the site. Lay similar Halloween yard decorations in groups so you can see what you’re working with. It’s been packed away for a year, after all!
- Place Halloween tombstones (mixed up randomly, as you’d see in an old cemetery, so it looks like the real thing) on the ground.
- Secure the tombstones to the ground, some upright and some at angles. I would also place 2-3 of them on the ground like they’d fallen over.
- If any figures are hanging, arrange the ghouls or skeletons (we’d use shepherd’s hooks for this) behind or amongst the gravestones.
- Arrange ghouls or skeletons to be placed on the ground.
- Fill in with skulls, hands, smaller skeletons, rats, birds, fake spider webs, etc…
- Secure what you need to with ties if you live in a windy area. We learned to do this after the 1st year!
- Border it all with a Halloween graveyard fence to complete the look.
Note: We stored similar items in boxes when the display came down. This makes it easier when installation time rolls around next year. And make sure to dry everything before packing away. If not, some of your Halloween props might mildew and be “funky” when you open them up next year.
Tools & Supplies
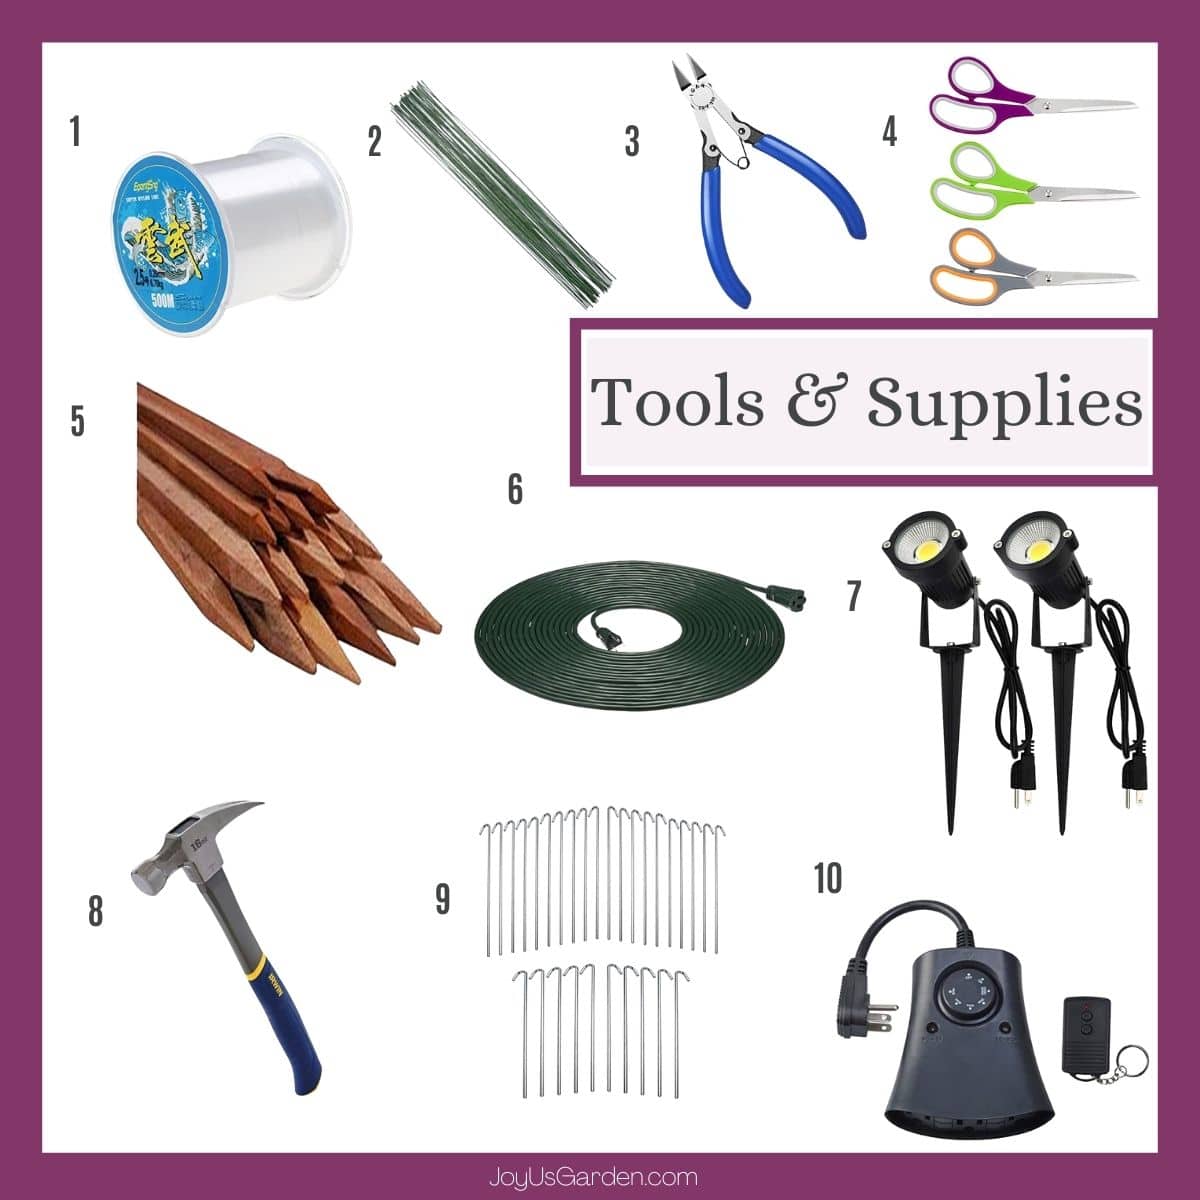
1- Fishing Line // 2. Wire // 3. Wire Cutters // 4. Scissors // 5. Stake // 6. Extension Cord // 7. Spotlight // 8. Hammer // 9. Steel Pegs // 10. Timer
Halloween Graveyard Decor
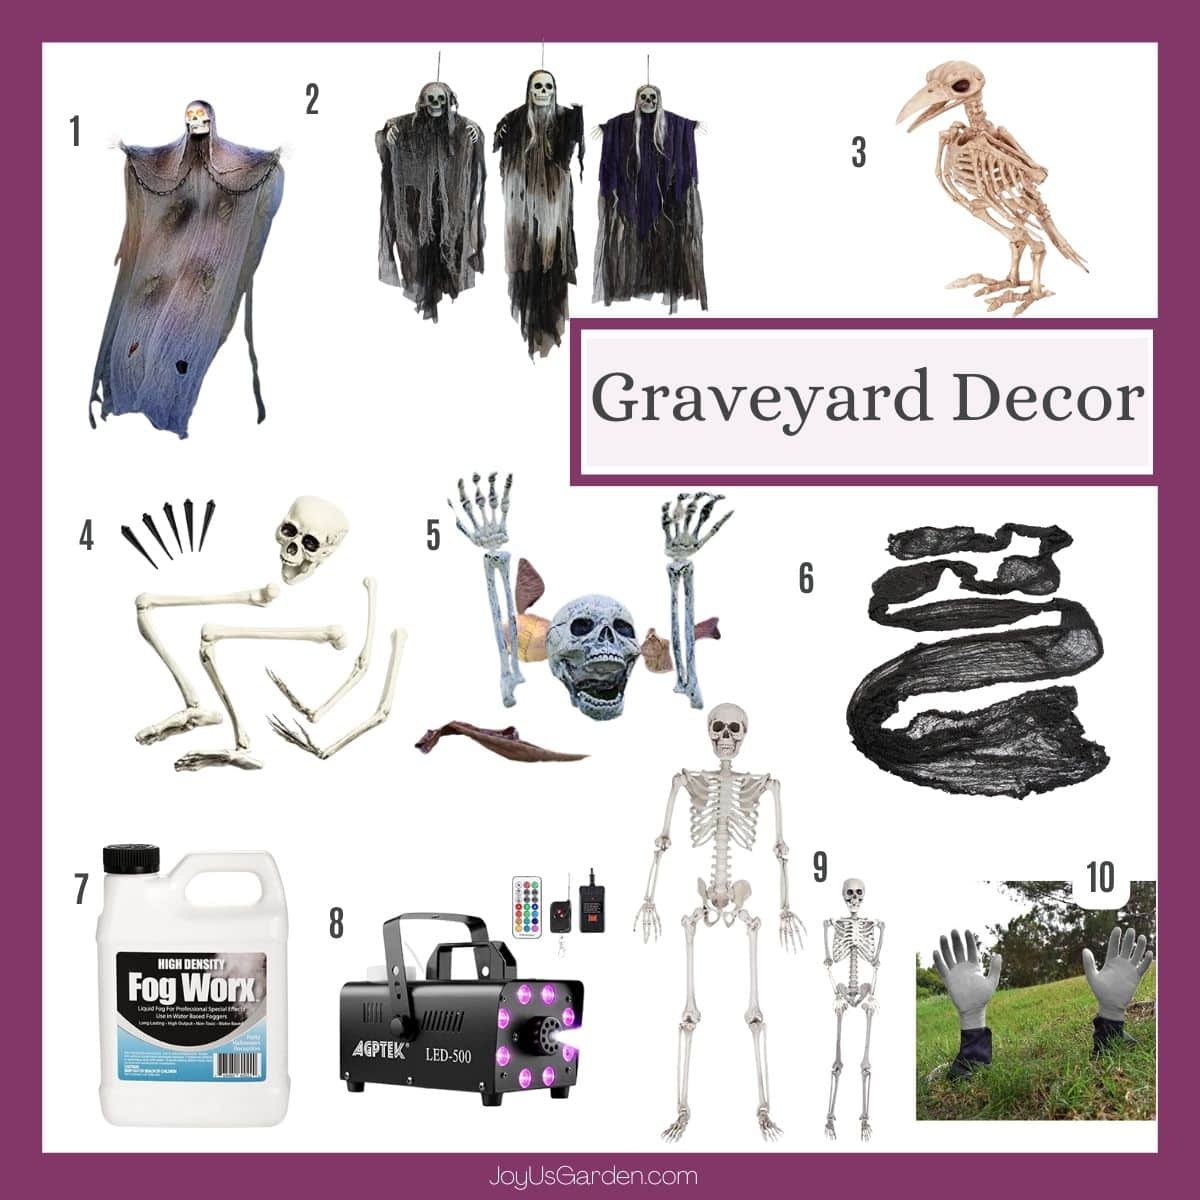
1. Skeleton Grim Reaper // 2. Hanging Ghost // 3. Skeleton Vulture // 4. Skeleton // 5. Skeleton Stakes // 6. Haunted Cloth // 7. Fog Juice // 8. Fog Machine // 9. Life Size Skeleton // 10. Zombie Hands
More Spooky Graveyard Decor
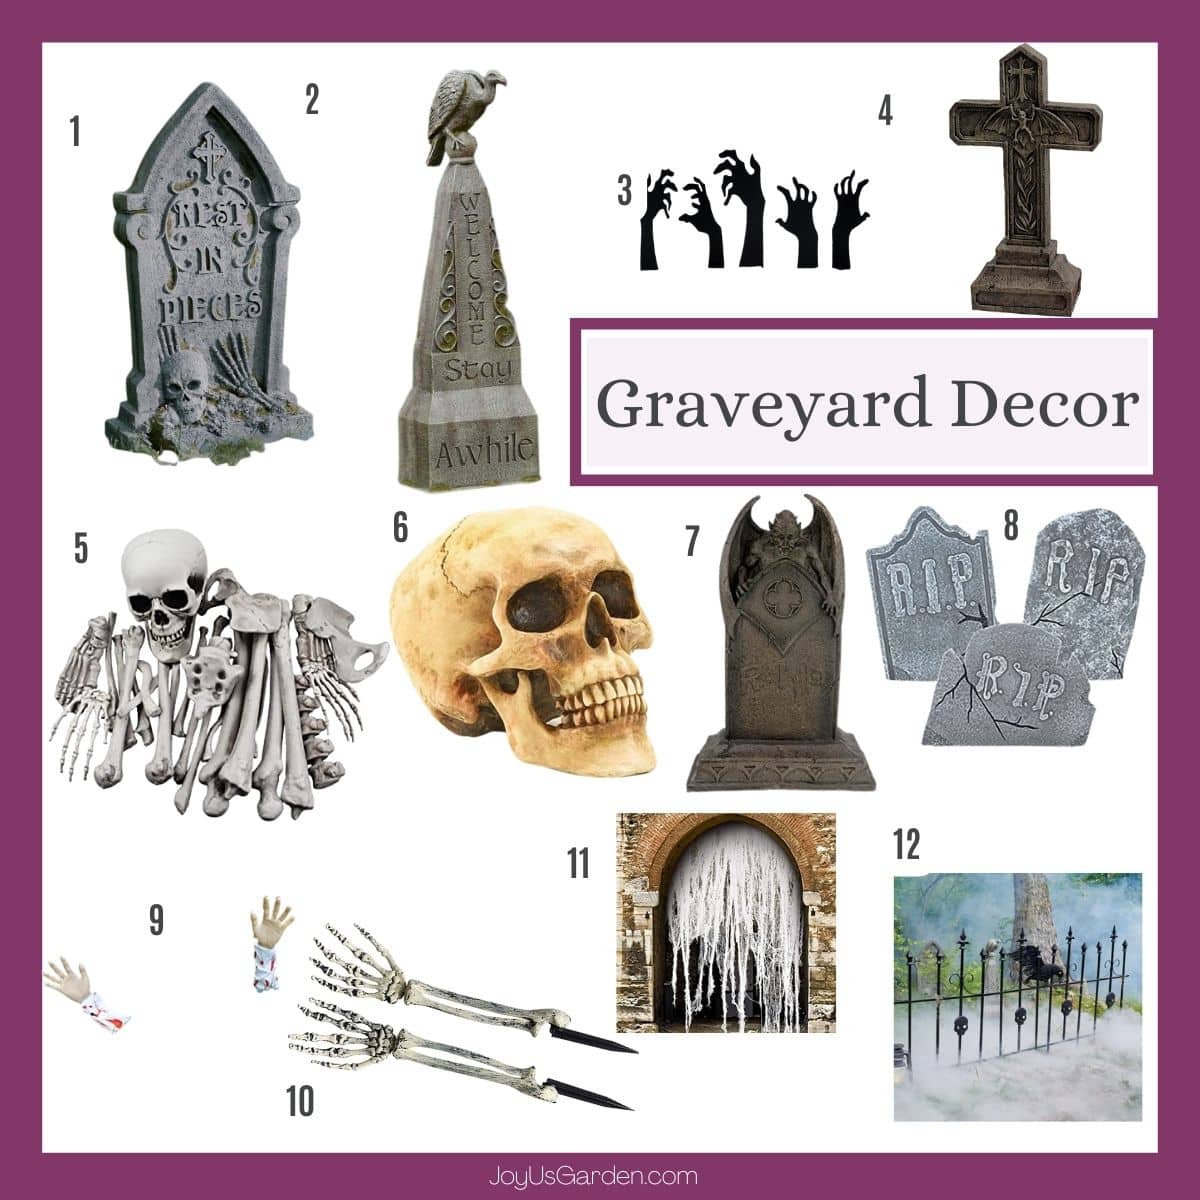
1. RIP Tombstones // 2. Welcome Tombstone // 3. Black Stake Hands // 4. Cross Tombstone // 5. Skeleton Bones // 6. Skull // 7. Demon Tombstone // 8. Tombstone Set // 9. Bloody Arms // 10. Skeleton Arms // 11. Creepy Cloth // 12. Cemetery Fence
Even More Graveyard Decorations
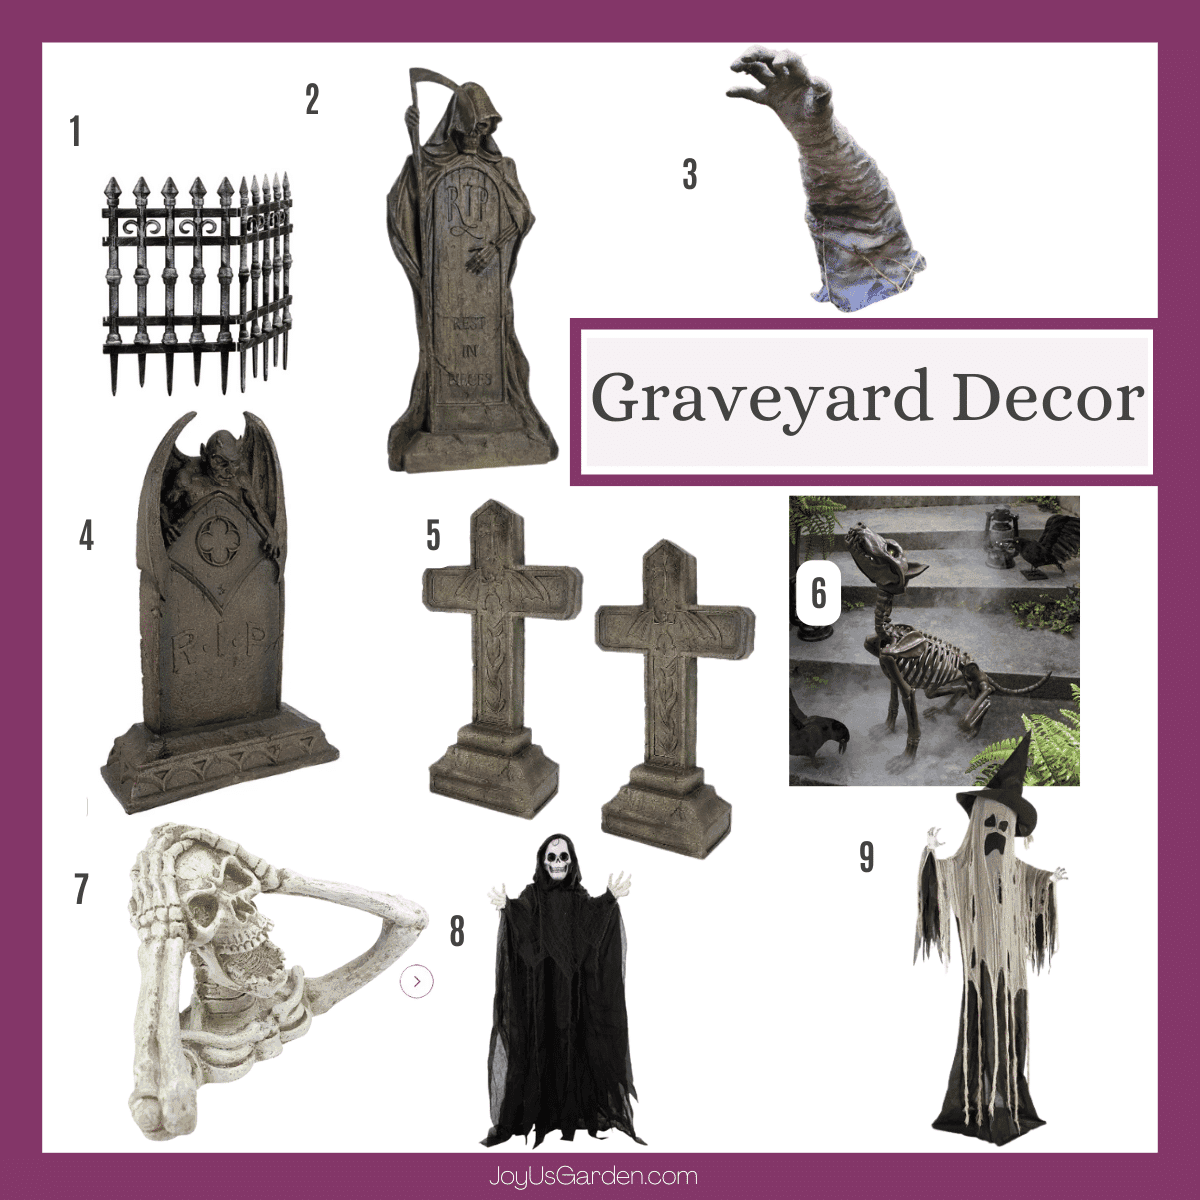
1. Cemetery Fence // 2. Grim Reaper // 3. Halloween Hand // 4. Vampire Tombstone // 5. Cross Statues // 6. Skeleton Wolf // 7. Skeleton Statue // 8. Tattered Reaper // 9. Witch Ghost //
Tombstones
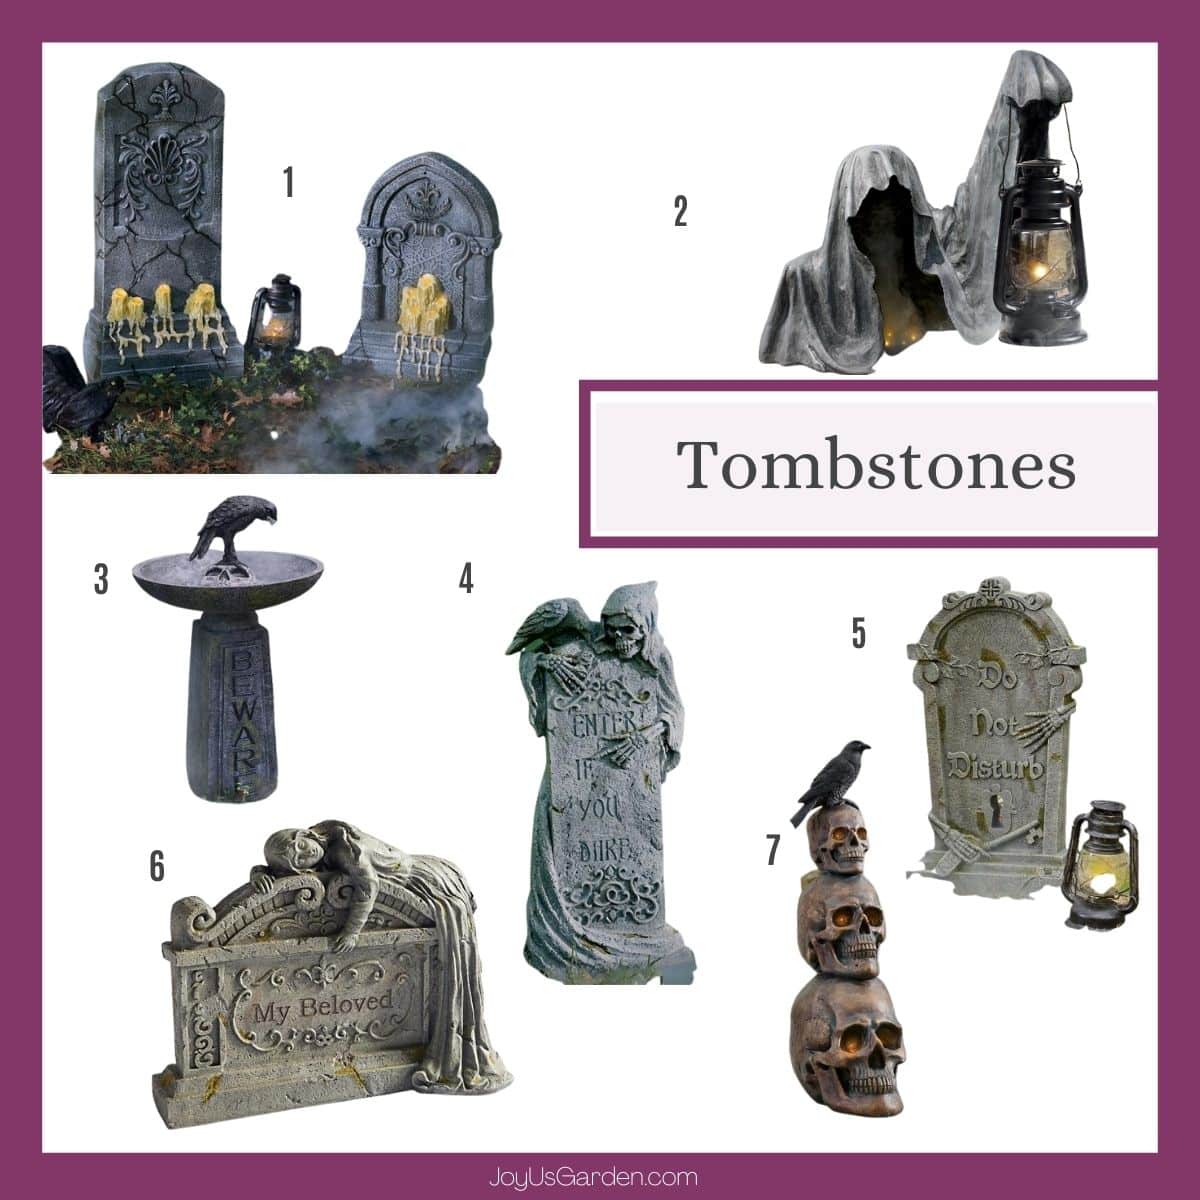
1. Candle Tombstone // 2. Reaper Tombstone // 3. Bird Bath Tombstone // 4. If You Dare Tombstone // 5. Do Not Disturb Tombstone // 6. My Beloved Tombstone // 7. Stacked Skull Tombstone
Step By Step DIY Halloween Video Guide
Things to think about when creating your Halloween graveyard display
*How big do you want it to be? My client has a big front yard, so hers takes up a lot of room. Yours may be smaller and more compact. Also, the amount of storage space you have will be a factor.
*How long will it stay up for? Will it be one day and one night or a few weeks? This will determine how sturdily you construct it. This graveyard stays up for 3-4 weeks and is a few blocks from the Pacific Ocean. Materials need to be well anchored with stakes, ties, and fishing line because of the wind.
*Hand in hand with the above, your weather will determine the materials you purchase. I prefer using plastic or composite gravestones, skulls, bones, etc. (rather than styrofoam) because they’re longer lasting. The styrofoam gravestones are lighter and cheaper but tend to mark up easily (a little gray or black paint covers that up). The cloth ghouls have weathered the elements for years just fine. The more tattered and stained they are, the more realistic they look!
*How long will your graveyard be displayed? Will it be just a season or the long haul? If it’s for one season, then you need to buy all your materials at once for an effective display and can get away with cheaper materials. For the long haul, you can buy new, sturdier materials each season and expand your display.
*Will it be spooky or downright scary? Because 100s of kids came to see this display, we kept it spooky and not bloody/gory.
More Spooky Halloween Decorations: Halloween Front Porch Decorations Reused Each Year To Create A New Look, Halloween Yard Decorations: Delightfully Scary Decor Ideas
*Buy a variety of gravestones, just like you’d see in a regular cemetery. I grew up in New England, where my town had a few very old cemeteries. The tombstones were quite diverse!
* Fishing line is essential to a job like this, especially if your display is up for the long haul and/or you live in a windy area. We’d go through a roll of it every season for this graveyard and the front porch displays.
* Have plenty of covered wire and/or green wire on hand, along with wire cutters. We used a lot of wire along with fishing line.
* If necessary, map the electrical before you start connecting. This display we did (including the front porch, walkway, and garden areas) had multiple things plugged in that needed to be figured out in advance. We used A LOT of extension cords. There is only so much which can be plugged into one outlet. Otherwise, parts of your Halloween display will go dark.
* Put all your things electric on exterior timers – it saves you plugging and unplugging them every evening. Plus, it saves energy.
* Tatter and slit your ghosts and ghouls even more than they already are – that way, they’ll flutter in the wind even more. We’d also rub them in the dirt a bit to roughen them up a bit. Old, beat-up ghouls you might send to the trash look just fine on the ground!
*Be sure to position some of your Halloween tombstones at an angle and have some appear as though they’ve fallen on the ground. This makes the graveyard look older and creepier.
*Creepy cloth, skeletons, a zombie hand or 2, bones, skulls, and some skeleton animal props added here and there create even more of a haunted effect.
* The fog machine is optional, but a thick fog is an extra spooky touch on Halloween night!
The haunted graveyard scene you see here and in the video takes a little time to construct because the lawn is artificial, and everything must be attached to platforms. You’re most likely doing yours on the lawn so the foundation or plant stakes can be hammered into the ground. You can then attach your gravestones and ghouls with wire or fishing line.
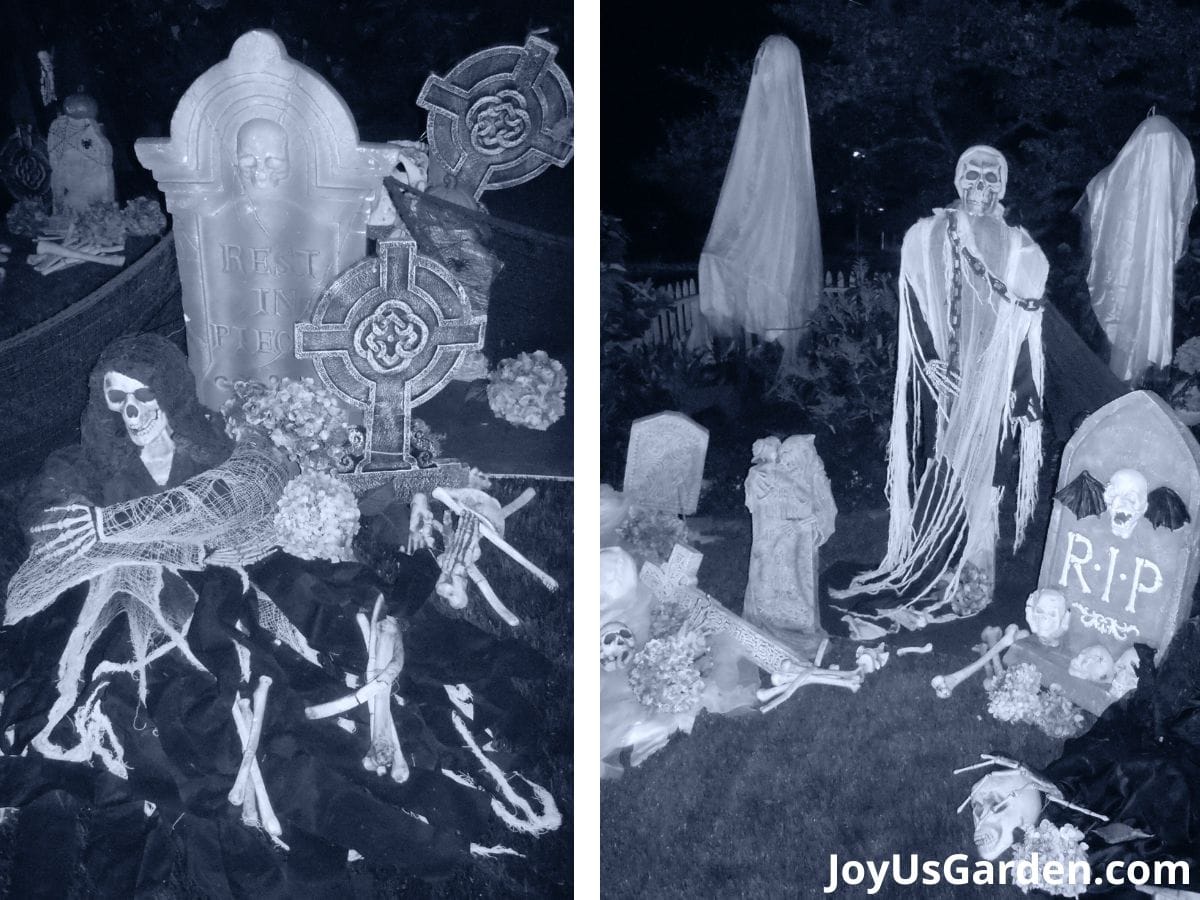
The headstones I used are made of various materials, including styrofoam, fiberglass, resin, and plastic. I’d throw in some faded Hydrangea flowers (fortunately, the blossoms were dying out around this time) for that “Morticia Addams” touch.
“As the sky grows dark and the moon glows bright, as strange creatures and critters appear in the night, as goblins growl and the werewolves whine, hope that Halloween sends a chill up your spine!”
We hope these spooky Halloween graveyard ideas have inspired you to create a hauntingly spectacular scene that captures the essence of Halloween. With the right materials and some elbow grease, you can transform your yard into an eerie cemetery that’ll impress trick-or-treaters, neighbors, and friends alike.
Wishing you a delightfully eerie Halloween,

- About the Author
- Latest Posts

Nell, the founder of Joy Us garden, was born into a gardening family and grew up in Connecticut’s countryside. After living in Boston, New York, San Francisco, & Santa Barbara, she now calls the Arizona desert home. She studied horticulture & garden design, working in the field all her life. Nell is a gardener, designer, blogger, Youtube creator, & author. She’s been gardening for a very long time & wants to share what she’s learned with you.