How To Propagate Spider Plants: An Easy Step-By-Step Guide
Spider Plants have a fun, somewhat wild look. They’re tough, easy-going, and among the easiest plants to grow. Best of all, they make babies without you having to do a thing! Here’s how to propagate Spider Plants so you can grow even more.
They’re a snap to propagate once you know what to do with those babies. Plus, Spider Plants are pet-friendly indoor plants, making them even more appealing. Before you know it, you’ll have plenty of new plants to keep or share with family and friends.
Botanical Name: Chlorophytum comosum Common Names: Spider Plant, Ribbon Plant, Airplane Plant, Spider Ivy
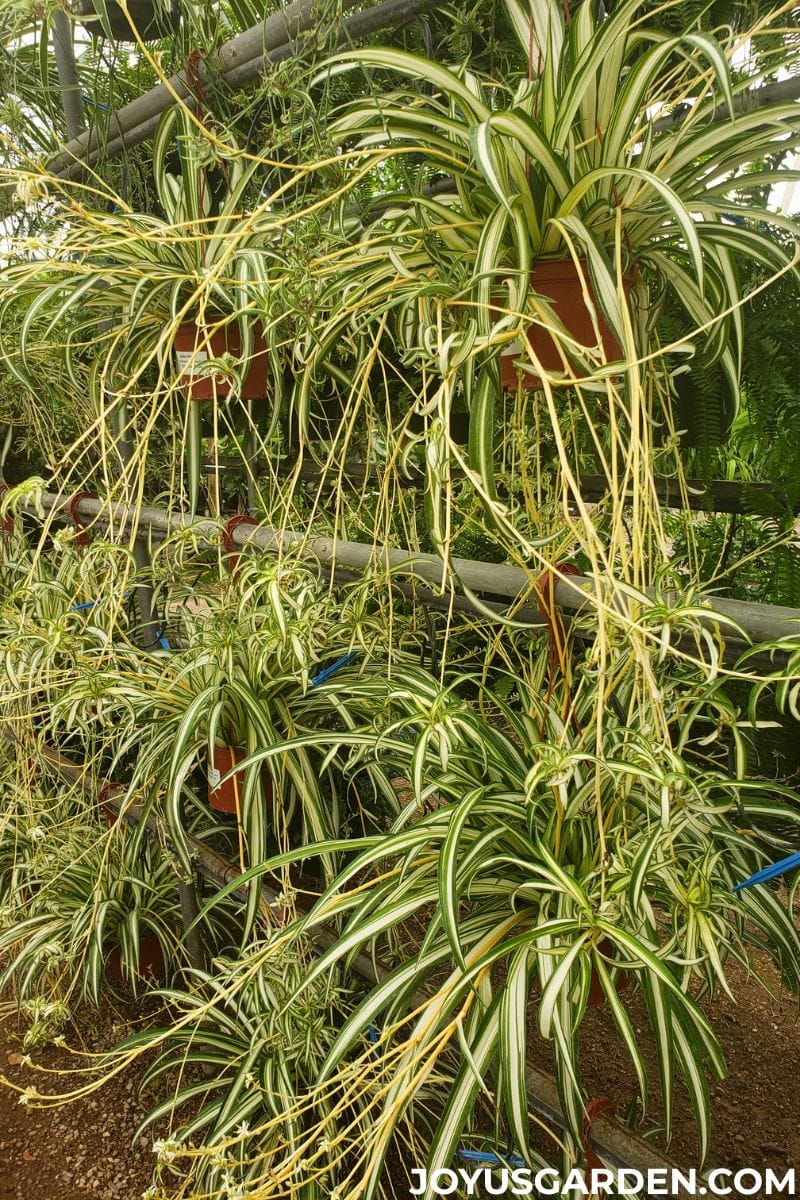
How To Propagate Spider Plants
What are the Baby Plants called?
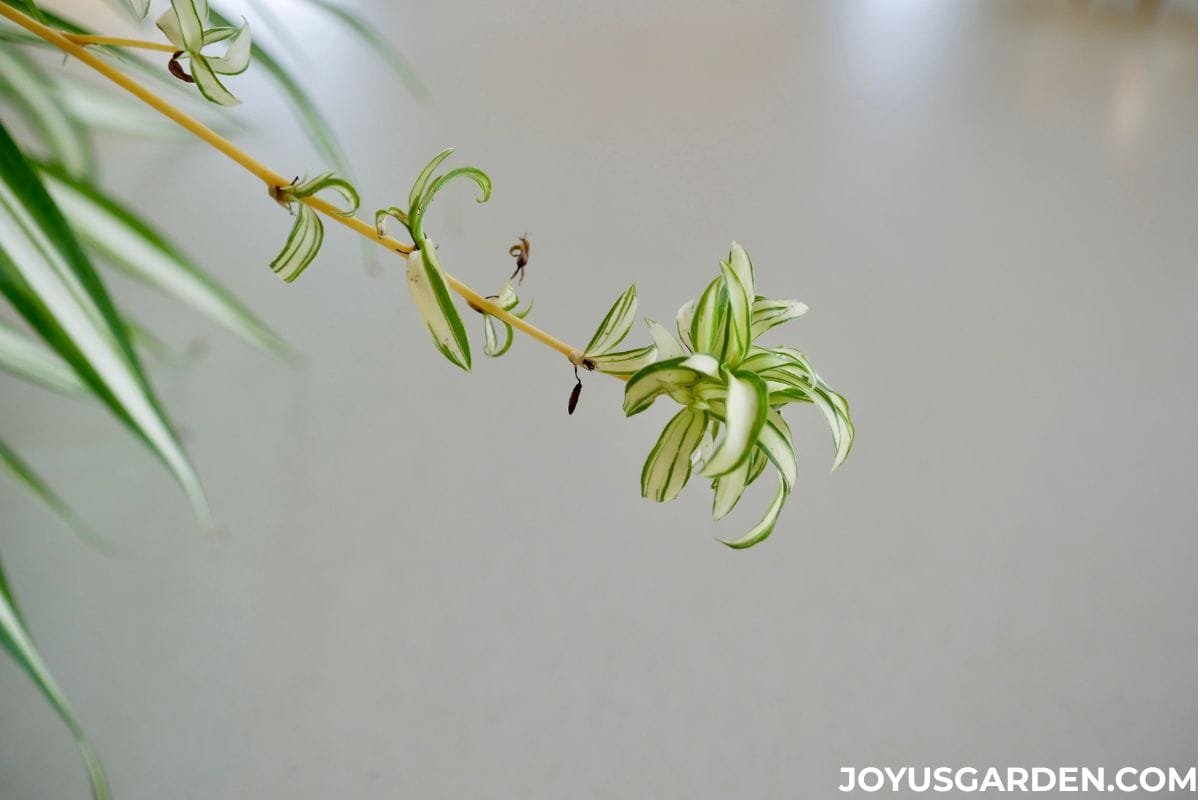
The baby plants grow on the ends of the long stems (runners) after the flowers fade. They’re commonly called spiderettes, babies, pups, or plantlets. No matter the name, they’re a snap to root and grow into new Spider Plants.
When to Propagate Spider Plants
The best time to propagate Spider Plants is during the growing season, spring and summer (plus early fall in temperate climates). Warm temperatures help the babies root faster and get off to a strong start. You can certainly do it in winter, but you’ll need a little more patience because the root growth is slower.
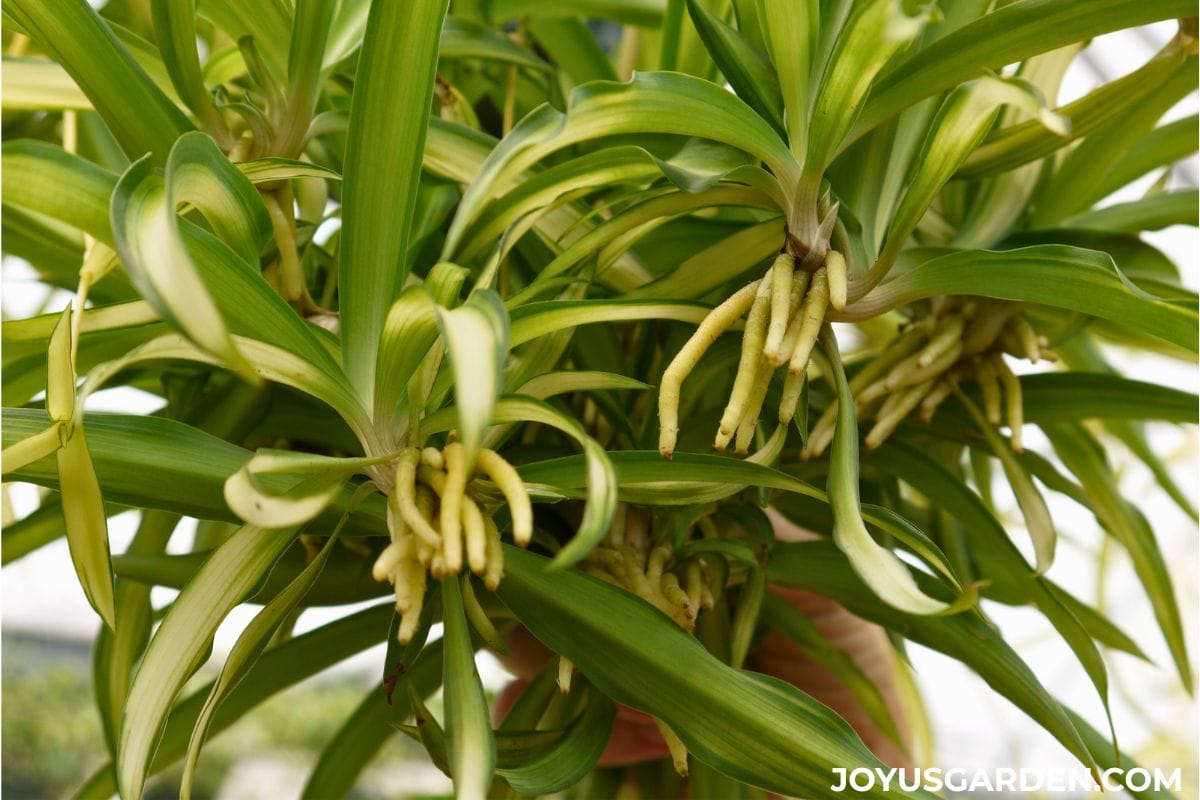
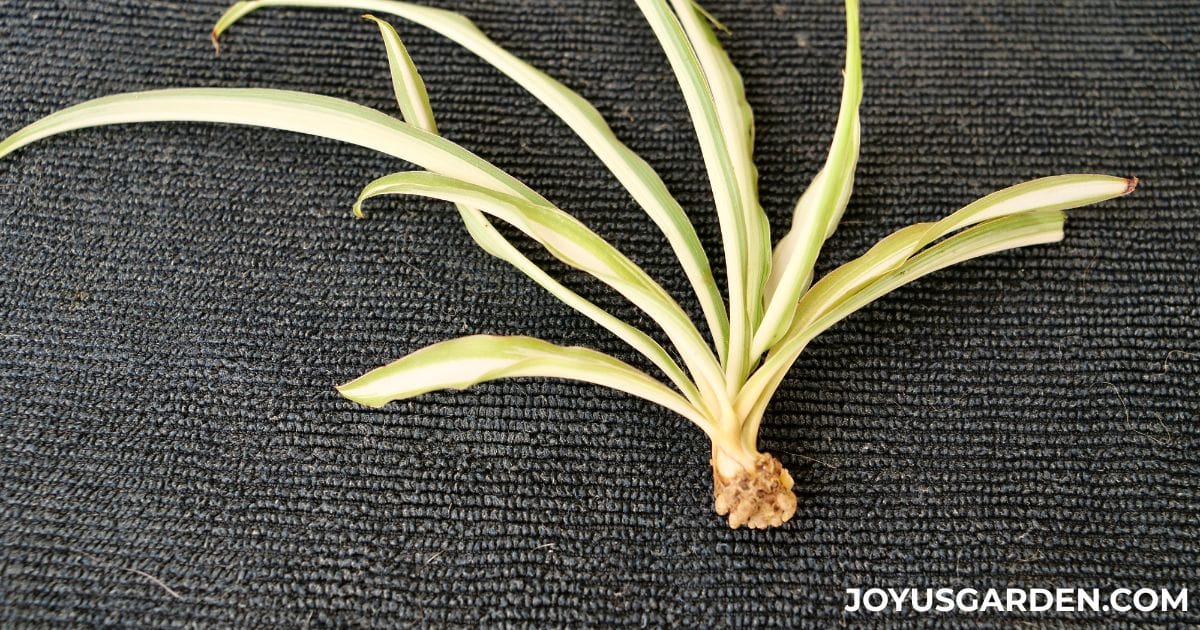
When Spiderettes Are Ready to be Propagated
On the bottom of each spiderette, you’ll see little brown bumps (nubs). These are the beginnings of new roots, so don’t mistake them for damage or pests. As the babies grow and stay attached to the mother plant, those nubs often develop into small white roots.
Once you see the root nubs or white root, or both, the spiderettes are ready to be propagated! I’ve rooted young spiderettes without visible root nubs, they just needed a little more time, so I prefer to leave them on the mother plant to mature.
Tools You’ll Need
Spider Plants can be propagated in several ways, so rather than a long list, I’ll include the tools and supplies you’ll need with each method below. Hopefully, this will make it easier to choose the method that works best for you.
How To Grow Spider Plants: Answering Your FAQs
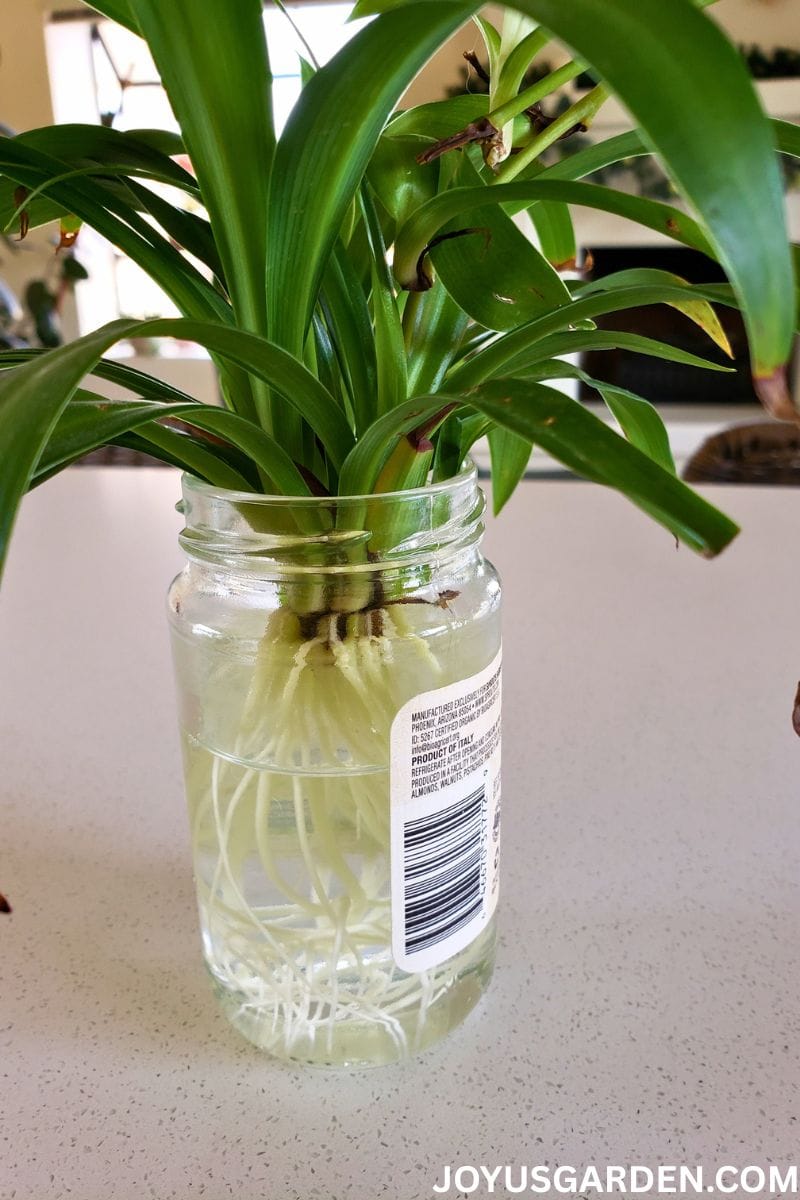
Propagating Spider Plants in Water
Water propagation is my preferred method because I find it the easiest way. I like being able to see the rooting action and watch the progress!
Tools You’ll Need:
Pruners, nippers, or sharp scissors: Make sure your cutting tool is clean and sharp before cutting the spiderettes from the mother plant.
A container for rooting: I like using a low, clear glass container because the babies don’t sit too deep in the water, and I can easily monitor the water level and root growth.
Watering: It’s best to use filtered or distilled water for this plant, as tap water high in minerals causes brown leaf tips. Keep the water level just above the roots, but avoid submerging the entire spiderette. Change the water every few days to keep it fresh and help prevent bacterial buildup.
Propagating Spider Plants in Soil Mix
Soil propagation is a favorite of many and is the method most commonly used by commercial growers.
Tools you’ll need:
Pruners, nippers, or sharp scissors: Make sure your cutting tool is clean and sharp before cutting the spiderettes from the mother plant.
Pot: A small pot with drainage holes. If you’re propagating multiple spiderettes together, use a larger pot.
Mix: Use a well-draining, aerated potting mix formulated for houseplants.
Watering: Keep the top inch of the potting mix lightly moist. If the spiderettes are already further along, you can water a little more deeply. As the roots become established, gradually reduce the watering frequency.
Propagating Spider Plants While Attached to the Mother Plant
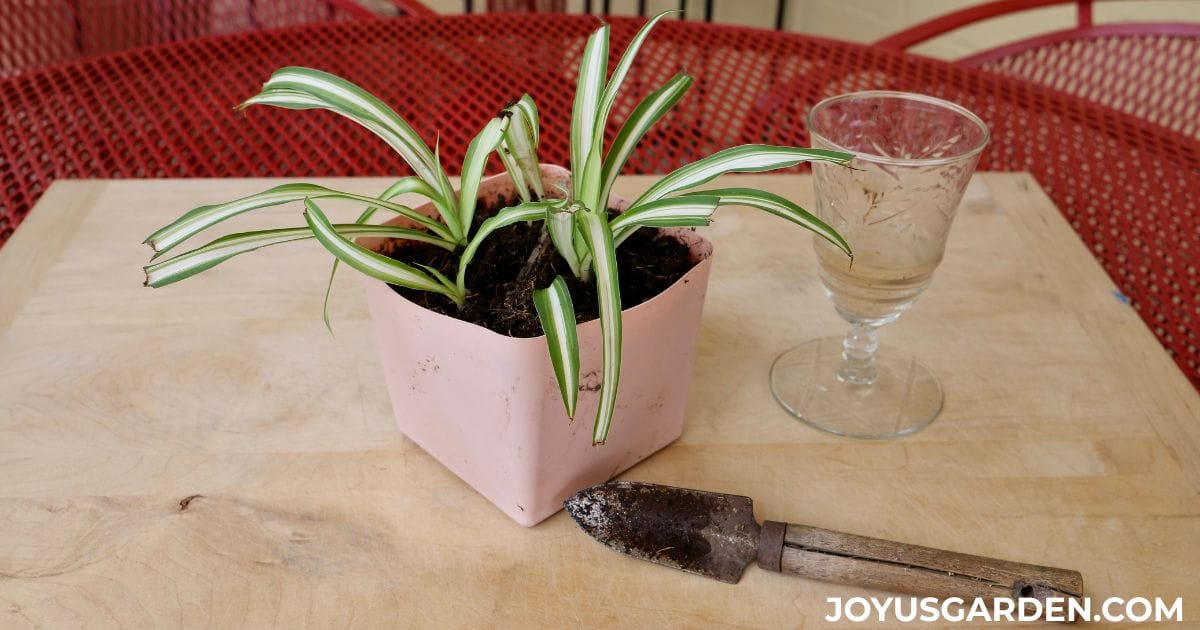
This method is almost identical to the soil propagation method above, and the tools and watering will be the same. The difference is that you leave the baby attached to the mother plant while it develops roots. This method works if your Spider Plant isn’t hanging, and it’s especially fun for kids!
Place a pot filled with mix next to the parent plant, keeping the runner still attached. Gently press a baby (or several babies, depending on the pot size) into the mix. If it doesn’t want to stay in place, anchor it with a floral pin. A piece of wire bent into a “U” shape or a stretched-out bobby pin works too.
Once the baby has developed roots and feels anchored in, snip the runner (stem) to separate it from the mother plant.
Propagating Spider Plants by Division
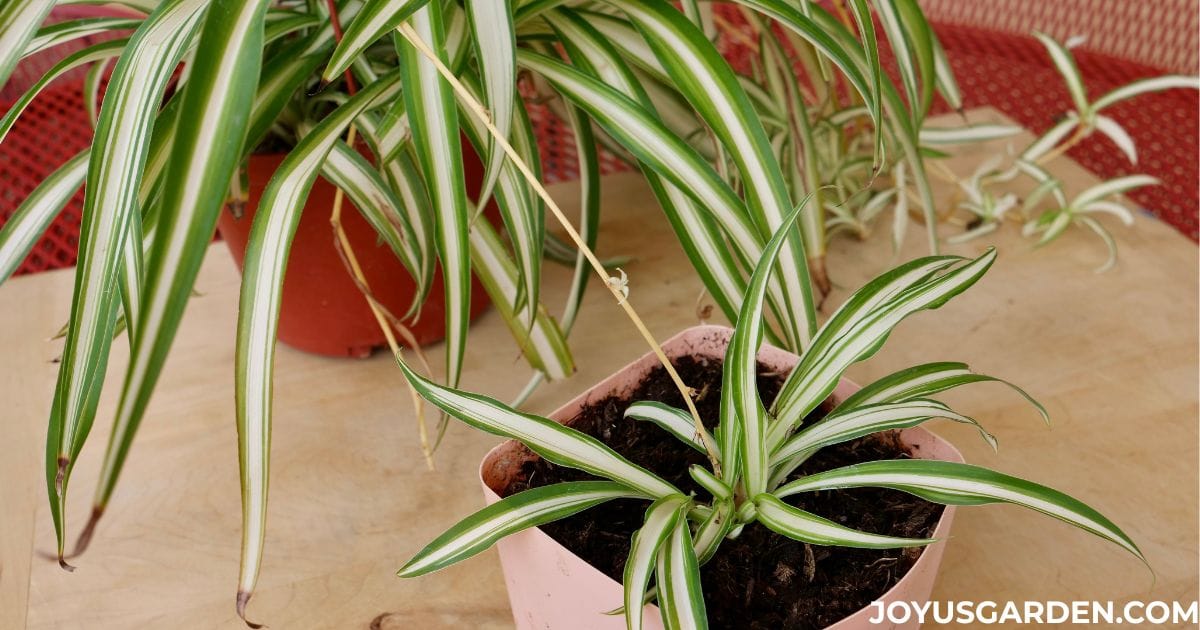
I had two large Spider Plants growing outdoors at my home in Santa Barbara. Just before moving to Arizona, I divided one of them into two plants and brought the smaller one with me. If your Spider Plant is mature, full, and tight in its pot, dividing it will be more challenging.
Spider Plants have tough, thick, fleshy roots and can handle a little roughing up. When I divided my very mature plant, I started with a trowel but eventually switched to a sharp knife. I lost some roots in the process, but there were still plenty left, so don’t worry if you lose a few too.
Choose appropriately sized pots with drainage holes for your divided plants. Fill each pot to the appropriate level (so the top of the rootball is slightly below the top of the pot) with a well-draining, aerated potting mix formulated for houseplants. Place the plant in the pot, then fill in around the root ball with more mix. Optional: mix in a little compost as you plant for added nourishment.
More info: Spider Plant Repotting
Propagating by Seed
I grow herbs, lettuces, and sprouts from seed, but that’s about it, so I can’t speak from experience on this. Spider Plants produce seeds, so if you’re very patient, try giving it a go. This method takes the longest.
Spider Plant Babies Care
Light exposure: Place your Spider Plant babies in bright, indirect light. A south- or west-facing exposure can work, but keep them at least 5′ away from windows. Too much direct sunlight can scorch the young plants.
Temperature: Average room conditions are fine, but warmer temperatures will encourage faster rooting and growth. This is why spring and summer are the best times to propagate Spider Plants.
Humidity: Spider Plants appreciate extra humidity, but it isn’t required. I live in the dry southern Arizona desert, and mine do just fine without high humidity.
Pruning: Not much is needed. I remove any dead or damaged foliage.
Fertilizing: Don’t fertilize spider plant babies while they’re rooting, as they’re busy developing healthy root systems and don’t need it. I wait about a year or so until the new plants are well established before I start feeding them.
Watering: Instructions are outlined in each propagation method above.
Once the roots are well established, gradually reduce watering and treat your new plants like mature Spider Plants.
For more information on growing these fun plants, check out our Spider Plant Care Guide.
Why Spider Plants Aren’t Producing Spider Babies
Age: Mature plants produce babies when 1-3 years old.
Lack of light: They aren’t low-light plants. They do best in a bright spot with indirect sunlight. If the levels are inadequate, the plant will be weaker and produce fewer, if any, babies.
Pot size: If the pot is too big and the roots have too much room, babies don’t form. They like to be slightly pot-bound.
Feeding: Spider Plants are pretty scrappy, but as they age and their soil depletes, seasonal monthly feeding with a balanced houseplant fertilizer is recommended. Just like with humans, added nutrients are a good thing!
Spider Plant Propagation Video Guide
How To Propagate Spider Plant FAQs
How long do the spiderettes grow in water?
The longest I’ve kept Spider Plant babies in water is about five months, and they did just fine. A friend of mine grew a few in water for well over a year, but the leaves started looking a bit stretched out. While Spider Plants aren’t aquatic plants, they can grow in water for a long time.
If you plan to keep yours in water for a year or longer, feed it with a fertilizer made for hydroponic plants so it gets the nutrients that plain water can’t provide.
Do Spider Plant babies need fertilizer?
No, not while propagating because the roots are still growing. If you plan to grow them in water long-term, you’ll need a fertilizer formulated for hydroponic plants so they can get the nutrients they need.
Can I leave the babies attached to the mother plant forever?
If there are just a few babies, sure. However, as they mature and grow larger, they eventually zap energy from the mother plant. The same goes if one plant is producing lots of babies. Depending on size and number, I remove some or all of them so both the mama plant and her babies are happier and healthier.
Can one Spider Plant baby grow into a full, mature plant?
Yes, it can. If the conditions are right, Spider Plants grow quickly and mature into a good-sized plant in one to two years.
Should I cut off the flowers before propagating a spider plant?
Those flowers eventually turn into baby Spider Plants. Don’t cut them off unless you want a “neater” plant with no babies.
For more information on growing these fun plants, check out our Spider Plant Care Guide.
Conclusion: I’ve been propagating spider plants for many years, and it never gets old watching those babies grow into healthy new plants. It’s such an inexpensive way to add more indoor plants to your home or share them with friends and family.
No matter which method you choose, propagating spider plants is easy, fun, and rewarding. Give it a try, you’ll see just how simple it is!
Happy gardening,

- About the Author
- Latest Posts

Nell, the founder of Joy Us garden, was born into a gardening family and grew up in Connecticut’s countryside. After living in Boston, New York, San Francisco, & Santa Barbara, she now calls the Arizona desert home. She studied horticulture & garden design, working in the field all her life. Nell is a gardener, designer, blogger, Youtube creator, & author. She’s been gardening for a very long time & wants to share what she’s learned with you.