How To Plant Paddle Plant (Flapjacks Kalanchoe) Cuttings
Thinking of planting succulent cuttings? These easy steps will help you get your paddle plant cuttings started and your plants on their way.
Sometimes your plants become much too happy, which leads to them growing and growing! My gorgeous Paddle Plant was no different. It was overtaking the other succulent beauties in the same pot they were all growing in. It was time for a haircut and thinning out. I had intended to let the 2 cuttings heal over for 2 weeks but it ended up being almost 4 weeks; you know how that goes! It was time to plant those Paddle Plant cuttings and get them on their way to a new start in life.
This process is very simple especially if you’re new to the world of planting succulent cuttings. The materials used and the steps taken are few. My Paddle Plant, aka Flapjacks Plants or Kalanchoe luciae in botanical speak, is tinged with a lot more red in the cooler winter months. In summer when the temps inch well over 100F and the sun becomes even more intense, the leaves are solid green.
How to Plant Paddle Plant Cuttings
Materials Used
2 – Paddle Plant Cuttings
1 – 6″ grow pot
Succulent & cactus mix. I use 1 which is produced locally here in Tucson & succulents love it. This one is good too. If you’re using a store-bought mix like the 1 in the link, you might consider adding some pumice or perlite to further up the ante on the aeration & lightness factor. When rooting cuttings, you want the mix to be loose, well-drained & light so those roots can easily form.
1 – Chopstick. The taller ones are great for staking up succulent cuttings!
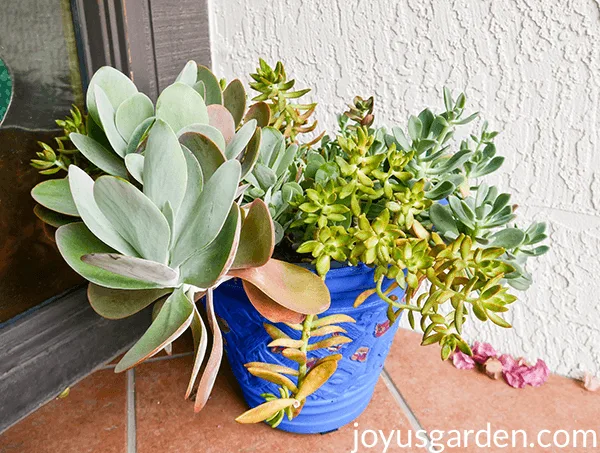
This is the mother plant I took these paddle plant cuttings from. There are lots of babies coming at the base even though I’ve thinned some out.
Steps Taken for the Paddle Plant Cuttings
Here you’ll see how I pruned the mother plant & took these cuttings.
1.) Let the Plant Heal
This doesn’t have much to do with the planting but I let these cuttings heal over in my utility room which has a skylight so the room is nice & bright. Healing over is important for succulents because their stems & leaves are full of water. You want the bottom to heal (or scab) over to protect the cutting from rotting out & also infection.
2.) Remove the Leaves
I removed any drooping lower leaves or those which didn’t look good. This gave me more stem to stick down in the pot because between the leaves & the stems, these cuttings were heavy.
3.) Use a Newspaper
I put newspaper over the drain holes of the grow pot. This keeps the loose mix from escaping with the 1st few waterings.
4.) Add Succulent and Cactus
Succulent & cactus was added in so the pot was about 1/2 full.
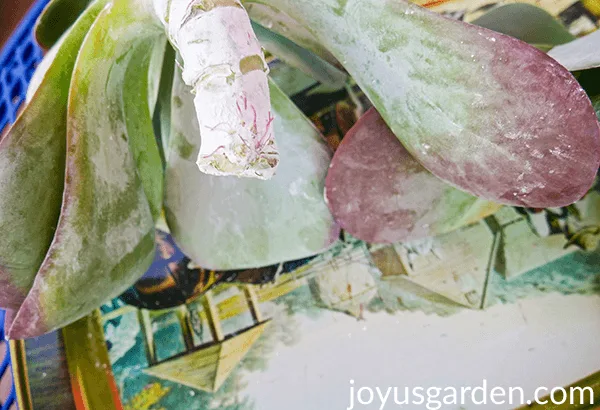
This is 1 cutting that has completed healed over. Quite a few small pink roots have emerged. These roots can appear on succulents before they’re even planted. The stems are white, a well as a few spots on the leaves. That’s the powder that’s this plant’s protective coating.
5.) Put the Cuttings in the Pot
I put the cuttings in the pot & had to reposition them a few times as well as take a few lower leaves off to get these 2 “flopsy mopsies” to stand up in the pot. Both of these cuttings had curved stems & were giving me a bit of a hard time. In the end, I won the challenge!
6.) Add Mix
The pot was topped off with succulent & cactus mix which I had to pack in a bit to get these heavy stems to stay uprighted. I don’t add compost & worm castings when planting & rooting cuttings because they don’t need it when the roots are forming. I’ll top the pot off with both in a couple of months when the roots are well on their way.
I give most of my houseplants a light application of worm compost with a light layer of compost over that every spring. Easy does it – 1/4 to 1/2? layer of each for a larger sized houseplant. Read about my worm compost/compost feeding right here.
7.) Place Cuttings in the Shade
These cuttings were moved under the bright shade of the grapefruit tree where they could settle in. I watered them thoroughly after 3 days because the temps are heating up around here.
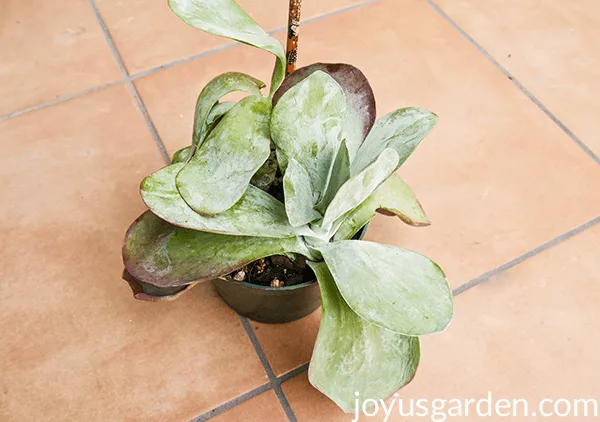
The cuttings, with the help of the chopstick, have rooted in beautifully. There’s already some resistance when I give them a gentle tug.
Things to Know While Planting Paddle Plant Cuttings
Spring and summer are a great time to propagate & plant cuttings. They root in readily in the warmer months.
As for care, I water newly planted cuttings a bit more often than I water my established succulents. At least for the 1st month or 2 depending on how the rooting in the process is going. I’m watering these every 5 days because the temps are in the mid-80’s to low 90’s. How often you water yours depends on the light, temperature, size pot & mix they’re in.
These Paddle Plants, like all their fellow succulents, can stay in smaller pots like this for a while because they don’t have extensive root systems. They could be separated into 2 plants further on down the line if I wanted. However, I’m keeping them as is. I’ll give them to a friend when they ready to leave the ‘ole homestead – I have fleshy succulents galore!
You’ll have cuttings to give away once your Paddle Plant is established and happy. Sharin’ the succulent love!
Happy gardening,

YOU MAY ALSO ENJOY:
Paddle Plant Propagation: How To Prune & Take Cuttings
How Much Sun Do Succulents Need?
How Often Should You Water Succulents?
How to Transplant Succulents into Pots
This post may contain affiliate links, you can read our policies here.

Thank you so much for the information. I have a plant that is so tall it is drooping- I live in a cold climate and the plant is inside but I will try to cut and plant it since It is urgent.
Cutting them back has always worked for me. Nell